crwdns2933423:0crwdne2933423:0

Changement écran Google Pixel 9 Pro XL

crwdns2931527:0crwdnd2931527:0crwdnd2931527:0crwdnd2931527:0crwdne2931527:0

crwdns2936315:0crwdne2936315:0
crwdns2936317:0crwdne2936317:0
crwdns2931653:014crwdne2931653:0
Google Pixel 9 Pro XL Screen Replacement: crwdns2935265:00crwdnd2935265:01crwdnd2935265:02crwdne2935265:0 Google Pixel 9 Pro XL Screen Replacement: crwdns2935265:00crwdnd2935265:02crwdnd2935265:02crwdne2935265:0
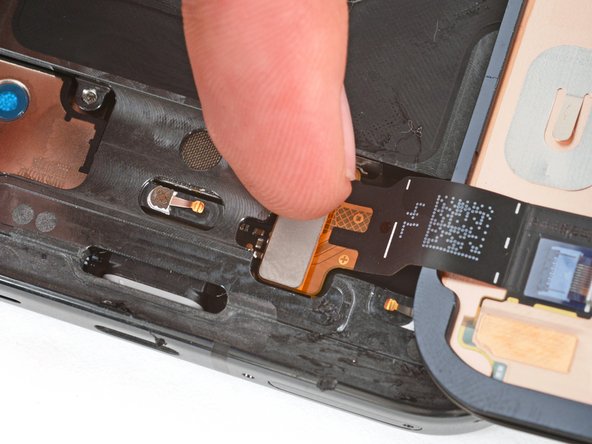
  • Be very careful not to strain the screen cable during this step. You may need to hold the screen up at an angle to help position the cable.

  • Align the screen press connector over its socket and gently press down on one side until it clicks into place, then press down on the other side.

  • Don't press down in the middle. If the connector is misaligned, the pins can bend and cause permanent damage.

  • Now is a good time to test your phone before sealing it up. Power it on and check that it works. Power it back down before you continue reassembly.

  • Hook the bottom edge of the screen cable bracket into its cutout and firmly press down on the top edge until the bracket clicks into place.

Faites très attention à ne pas forcer sur la nappe de l'écran pendant cette étape. Vous devrez peut-être maintenir l'écran incliné pour faciliter la manœuvre.

Alignez le connecteur à emboîter de l'écran sur sa prise et appuyez délicatement sur un côté jusqu'à ce qu'il s'enclenche, puis appuyez sur l'autre côté.

N'appuyez pas au milieu. Si le connecteur est mal aligné, les broches peuvent se tordre et causer des dommages irréversibles.

C'est le moment idéal pour tester votre téléphone avant de le refermer. Allumez-le et vérifiez qu'il fonctionne. Éteignez-le avant de poursuivre le remontage.

Accrochez le bord inférieur du cache de la nappe de l'écran dans son encoche et appuyez fermement sur le bord supérieur, jusqu'à ce que le cache s'enclenche.

crwdns2944171:0crwdnd2944171:0crwdnd2944171:0crwdnd2944171:0crwdne2944171:0