crwdns2933423:0crwdne2933423:0

Google Pixel 9 Pro XL Display tauschen

crwdns2931527:0crwdnd2931527:0crwdnd2931527:0crwdnd2931527:0crwdne2931527:0

crwdns2936315:0crwdne2936315:0
crwdns2936319:0crwdne2936319:0
crwdns2931653:014crwdne2931653:0
Google Pixel 9 Pro XL Screen Replacement: crwdns2935265:00crwdnd2935265:01crwdnd2935265:02crwdne2935265:0 Google Pixel 9 Pro XL Screen Replacement: crwdns2935265:00crwdnd2935265:02crwdnd2935265:02crwdne2935265:0
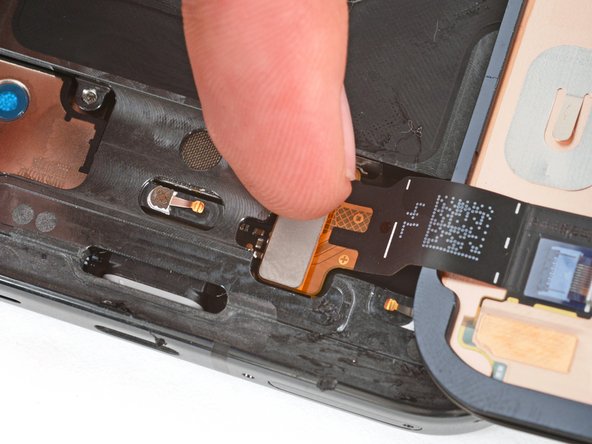
  • Be very careful not to strain the screen cable during this step. You may need to hold the screen up at an angle to help position the cable.

  • Align the screen press connector over its socket and gently press down on one side until it clicks into place, then press down on the other side.

  • Don't press down in the middle. If the connector is misaligned, the pins can bend and cause permanent damage.

  • Now is a good time to test your phone before sealing it up. Power it on and check that it works. Power it back down before you continue reassembly.

  • Hook the bottom edge of the screen cable bracket into its cutout and firmly press down on the top edge until the bracket clicks into place.

Sei sehr vorsichtig, damit das Displaykabel bei diesem Schritt nicht zu stark angespannt wird. Eventuell musst du das Display schräg halten, um das Kabel zu positionieren.

Richte den Druckstecker des Displays über seinem Anschluss aus und drücke ihn erst auf einer Seite nach unten, bis er einrastet, dann auf der anderen.

Drücke nicht in der Mitte nach unten. Wenn der Stecker nicht richtig sitzt, können die Kontakte verbogen und dauerhaft beschädigt werden.

Nun ist eine gute Gelegenheit, um das Smartphone zu testen, bevor du es wieder zuklebst. Schalte es an und prüfe, ob alles funktioniert. Schalte es wieder aus, bevor du es weiter zusammenzubaust.

Hake die Unterkante am Halter des Displaykabels in seine Öffnung ein und drücke die Oberkante fest herunter, bis sie einrastet.

crwdns2944171:0crwdnd2944171:0crwdnd2944171:0crwdnd2944171:0crwdne2944171:0