crwdns2933423:0crwdne2933423:0

ロジックボードの取り外し(バッテリー)

crwdns2931527:0crwdnd2931527:0crwdnd2931527:0crwdnd2931527:0crwdne2931527:0

crwdns2936315:0crwdne2936315:0
crwdns2936323:0crwdne2936323:0
crwdns2931653:05crwdne2931653:0
Logic Board Removal (Battery), Remove the logic board: crwdns2935265:00crwdnd2935265:01crwdnd2935265:03crwdne2935265:0 Logic Board Removal (Battery), Remove the logic board: crwdns2935265:00crwdnd2935265:02crwdnd2935265:03crwdne2935265:0 Logic Board Removal (Battery), Remove the logic board: crwdns2935265:00crwdnd2935265:03crwdnd2935265:03crwdne2935265:0
Remove the logic board
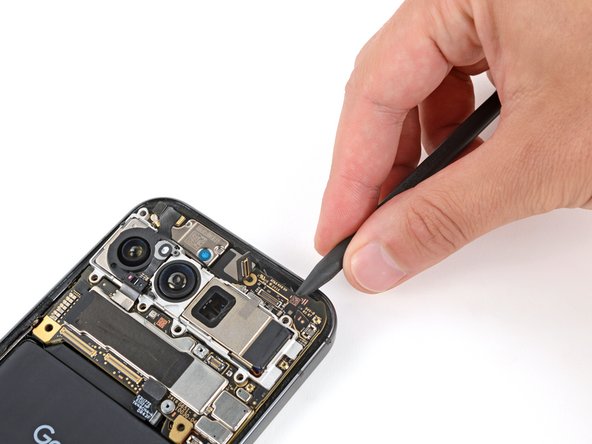
  • Use a spudger to pry up the top edge of the logic board until you can grip it with your fingers.

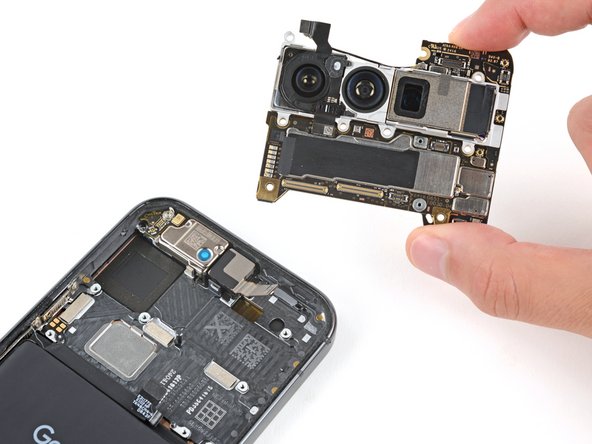
  • Grip the right side of the logic board and remove it, being careful not to snag the front facing camera and battery cables.

  • During reassembly, hold the front facing camera cable out of the way and lower the logic board into place.

スパッジャーを使って、指でロジックボードの上端が摘まめるまでこじ開けます。

ロジックボードの右側を握り、前面カメラとバッテリーケーブルを引っ掛けないように注意しながら取り外します。

再組み立ての際、前面カメラケーブルが邪魔にならないように固定して、ロジックボードを所定の位置に差し込みます。

crwdns2944171:0crwdnd2944171:0crwdnd2944171:0crwdnd2944171:0crwdne2944171:0