crwdns2933423:0crwdne2933423:0

Changement écran HMD Fusion

crwdns2931529:0crwdnd2931529:0crwdnd2931529:0crwdnd2931529:02crwdnd2931529:0crwdne2931529:0

crwdns2936315:0crwdne2936315:0
crwdns2936317:0crwdne2936317:0
crwdns2931653:04crwdne2931653:0
HMD Fusion Screen Replacement, Remove the screen screws: crwdns2935265:00crwdnd2935265:01crwdnd2935265:02crwdne2935265:0 HMD Fusion Screen Replacement, Remove the screen screws: crwdns2935265:00crwdnd2935265:02crwdnd2935265:02crwdne2935265:0
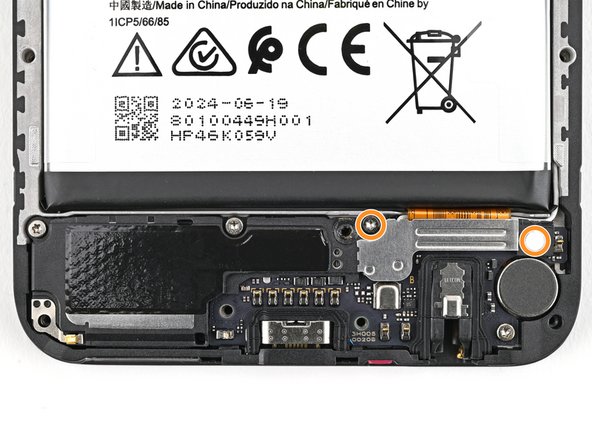
Remove the screen screws
  • Use a T3 Torx screwdriver to remove the seven 3.3 mm‑long screws securing the screen:

  • Five screws on the motherboard

  • Two screws on the loudspeaker

  • One of the screws on the loudspeaker may be covered by a sticker. Pierce through it with your screwdriver, or use tweezers to remove it.

Utilisez un tournevis Torx T3 pour retirer les sept vis de 3,3 mm de long qui fixent l'écran :

Cinq vis sur la carte mère

Deux vis sur le haut-parleur

L'une des vis du haut-parleur peut être recouverte d'un autocollant. Percez-le avec votre tournevis ou utilisez une pincette pour le retirer.

crwdns2944171:0crwdnd2944171:0crwdnd2944171:0crwdnd2944171:0crwdne2944171:0