crwdns2933423:0crwdne2933423:0

Google Pixel 9 Pro - スクリーンの交換

crwdns2936315:0crwdne2936315:0
crwdns2936323:0crwdne2936323:0
crwdns2931653:014crwdne2931653:0
Google Pixel 9 Pro Screen Replacement: crwdns2935265:00crwdnd2935265:01crwdnd2935265:02crwdne2935265:0 Google Pixel 9 Pro Screen Replacement: crwdns2935265:00crwdnd2935265:02crwdnd2935265:02crwdne2935265:0
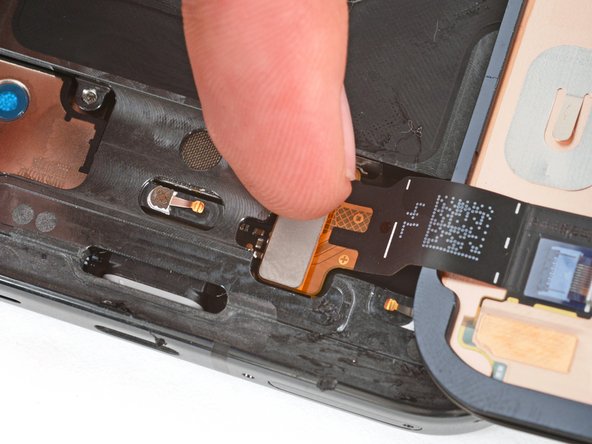
  • Be very careful not to strain the screen cable during this step. You may need to hold the screen up at an angle to help position the cable.

  • Align the screen press connector over its socket and gently press down on one side until it clicks into place, then press down on the other side.

  • Don't press down in the middle. If the connector is misaligned, the pins can bend and cause permanent damage.

  • Now is a good time to test your phone before sealing it up. Power it on and check that it works. Power it back down before you continue reassembly.

  • Hook the bottom edge of the screen cable bracket into its cutout and firmly press down on the top edge until the bracket clicks into place.

この手順を踏む際、スクリーンケーブルに過度に力を加えないように注意してください。引っ張りすぎると破損する恐れがあります。ケーブルをつなぐとき、場合によってはスクリーンを持ち上げて位置を調整する必要があります。

スクリーンのプレスコネクターをソケットに合わせ、左右どちらかの側で端子がはまるまで軽く押し続けます。一方で正しい場所にコネクターがはまったのち、もう一方で同様の手順を繰り返します。

コネクターの中央部を押さないでください。ソケットにコネクターが合わさっていない場合、端子のピンが曲がって取り付けることができなくなります。

スクリーンを取り付ける前に、一度端末が正しく起動するか確認しましょう。電源を入れ、動作に問題がないことを確かめてください。取り付け作業を続ける前に、必ず電源を切ってください。

スクリーンケーブルのブラケットを対応する切り抜き部分に引っ掛け、ブラケットがはまるまで上端を軽く押します。

crwdns2944171:0crwdnd2944171:0crwdnd2944171:0crwdnd2944171:0crwdne2944171:0