crwdns2935425:04crwdne2935425:0
crwdns2931653:04crwdne2931653:0

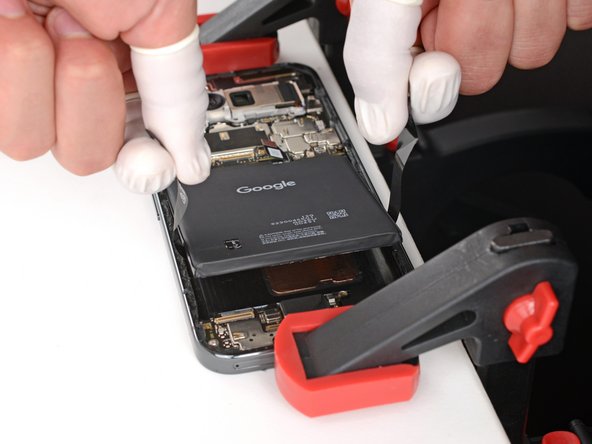


Separate the battery adhesive
-
Pull straight up on the battery pull tabs and apply constant, steady pressure until the battery separates from the frame.
-
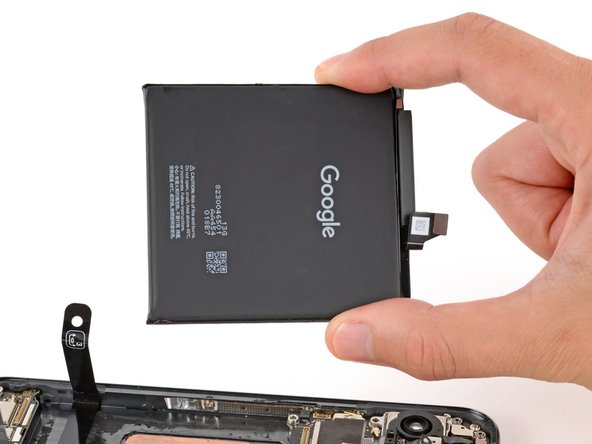
Remove the battery.
-
If you successfully removed the battery, congratulations! Skip down seven steps for reassembly information.
-
If the pull tab broke or accidentally slipped out from under the battery, don't worry! Go to the next step for an alternate battery removal method.
| [title] Separate the battery adhesive | |
| - | [* black] Wear [product|IF145-136|finger stalls|new_window=true] on your thumb and index fingers to help get a solid grip on the battery pull tabs. |
| - | [* icon_note] If you don't have finger stalls, you can use some [product|IF145-372|rubber gloves|new_window=true] instead. |
| [* black] Pull straight up on the battery pull tabs and apply constant, steady pressure until the battery separates from the frame. | |
| - | [* icon_note] If the battery doesn't separate after |
| + | [* icon_note] If the battery doesn't separate after one minute of steady pressure, apply more heat and try again. |
| [* black] Remove the battery. | |
| + | [* icon_caution] Never reuse a deformed or damaged battery—it's a fire hazard. Replace it with a new battery. |
| [* black] If you successfully removed the battery, congratulations! ''[guide|175932|Skip down seven steps|stepid=374228] for reassembly information''. | |
| [* black] If the pull tab broke or accidentally slipped out from under the battery, don't worry! ''Go to the next step for an alternate battery removal method.'' |
crwdns2944171:0crwdnd2944171:0crwdnd2944171:0crwdnd2944171:0crwdne2944171:0