crwdns2933423:0crwdne2933423:0

Google Pixel 9 - 背面ガラスの交換

crwdns2931529:0crwdnd2931529:0crwdnd2931529:0crwdnd2931529:08crwdnd2931529:0crwdne2931529:0

crwdns2935425:01crwdne2935425:0

crwdns2936315:0crwdne2936315:0
crwdns2936323:0crwdne2936323:0
crwdns2931653:01crwdne2931653:0
Google Pixel 9 Back Glass Replacement, Adhesive information: crwdns2935265:00crwdnd2935265:01crwdnd2935265:03crwdne2935265:0 Google Pixel 9 Back Glass Replacement, Adhesive information: crwdns2935265:00crwdnd2935265:02crwdnd2935265:03crwdne2935265:0 Google Pixel 9 Back Glass Replacement, Adhesive information: crwdns2935265:00crwdnd2935265:03crwdnd2935265:03crwdne2935265:0
Adhesive information
  • Adhesive secures the perimeter of the back glass to the frame.

  • When separating the adhesive, don't insert your tool more than 3 mm under the back glass to avoid damaging the internal components.

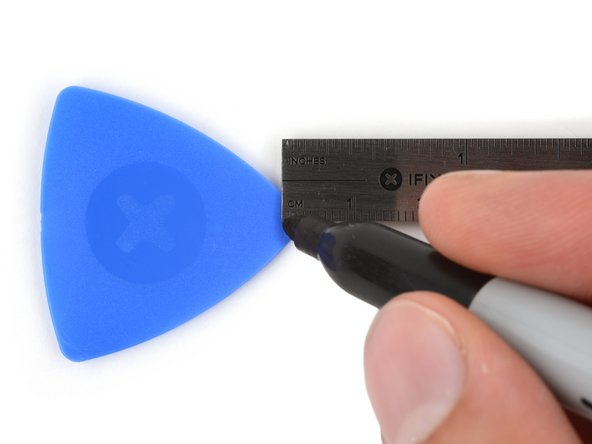
  • To help, measure and mark 3 mm from the tip of an opening pick with a permanent marker.

  • If your screen or back glass is badly cracked, a suction cup may not perfectly adhere.

  • Lay overlapping strips of packing tape over the glass to protect yourself and make disassembly easier. Ensure there's a smooth area near the bottom edge that's large and smooth enough for a suction cup to stick to.

接着剤は、背面ガラスの外周と端末のフレームを固定するために使用されます。

接着面をはがす際、工具などを3mm以上挿入しないでください。内部の精密機器が破損する恐れがあります。

油性ペンを使い、オープニングピックの先端から3mmの位置に印をつけることが推奨されます。

スクリーンか背面ガラスが著しく破損している場合、吸盤カップが完全に吸着しない可能性があります。

スクリーンにパッキンテープを重ねて貼ることで安全性が高まり、分解が簡単になります。吸盤カップで吸着できるような、テープを貼っていない箇所を画面の下端に残してください。

crwdns2944171:0crwdnd2944171:0crwdnd2944171:0crwdnd2944171:0crwdne2944171:0