crwdns2933423:0crwdne2933423:0

Sostituzione vetro posteriore Google Pixel 9

crwdns2931529:0crwdnd2931529:0crwdnd2931529:0crwdnd2931529:08crwdnd2931529:0crwdne2931529:0

crwdns2935425:01crwdne2935425:0

crwdns2936315:0crwdne2936315:0
crwdns2936321:0crwdne2936321:0
crwdns2931653:01crwdne2931653:0
Google Pixel 9 Back Glass Replacement, Adhesive information: crwdns2935265:00crwdnd2935265:01crwdnd2935265:03crwdne2935265:0 Google Pixel 9 Back Glass Replacement, Adhesive information: crwdns2935265:00crwdnd2935265:02crwdnd2935265:03crwdne2935265:0 Google Pixel 9 Back Glass Replacement, Adhesive information: crwdns2935265:00crwdnd2935265:03crwdnd2935265:03crwdne2935265:0
Adhesive information
  • Adhesive secures the perimeter of the back glass to the frame.

  • When separating the adhesive, don't insert your tool more than 3 mm under the back glass to avoid damaging the internal components.

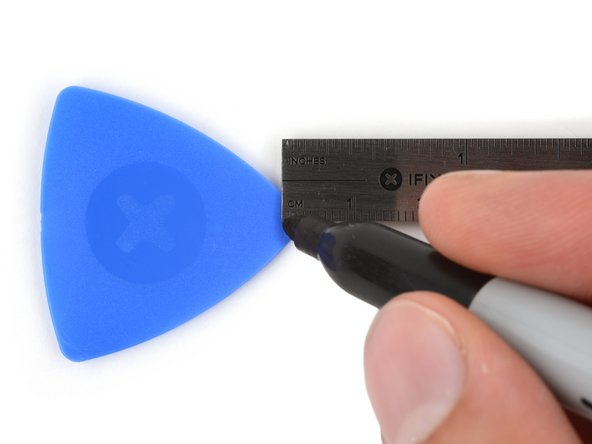
  • To help, measure and mark 3 mm from the tip of an opening pick with a permanent marker.

  • If your screen or back glass is badly cracked, a suction cup may not perfectly adhere.

  • Lay overlapping strips of packing tape over the glass to protect yourself and make disassembly easier. Ensure there's a smooth area near the bottom edge that's large and smooth enough for a suction cup to stick to.

L'adesivo fissa il perimetro del vetro posteriore al telaio.

Quando separi l'adesivo, non inserire l'attrezzo a più di 3 mm sotto il vetro posteriore per evitare di danneggiare i componenti interni.

Per aiutarti, misura e segna 3 mm dalla punta di un plettro di apertura con un pennarello indelebile.

Se lo schermo o il vetro posteriore è gravemente incrinato, una ventosa potrebbe non aderire perfettamente.

Applica strisce sovrapposte di nastro da imballaggio sul vetro per proteggerti e facilitare lo smontaggio. Assicurati che ci sia un'area liscia vicino al bordo inferiore, sufficientemente grande e uniforme per far aderire una ventosa.

crwdns2944171:0crwdnd2944171:0crwdnd2944171:0crwdnd2944171:0crwdne2944171:0