crwdns2933423:0crwdne2933423:0

Reemplazo del cristal trasero del Google Pixel 9

crwdns2931529:0crwdnd2931529:0crwdnd2931529:0crwdnd2931529:08crwdnd2931529:0crwdne2931529:0

crwdns2935425:01crwdne2935425:0

crwdns2936315:0crwdne2936315:0
crwdns2936331:0crwdne2936331:0
crwdns2931653:01crwdne2931653:0
Google Pixel 9 Back Glass Replacement, Adhesive information: crwdns2935265:00crwdnd2935265:01crwdnd2935265:03crwdne2935265:0 Google Pixel 9 Back Glass Replacement, Adhesive information: crwdns2935265:00crwdnd2935265:02crwdnd2935265:03crwdne2935265:0 Google Pixel 9 Back Glass Replacement, Adhesive information: crwdns2935265:00crwdnd2935265:03crwdnd2935265:03crwdne2935265:0
Adhesive information
  • Adhesive secures the perimeter of the back glass to the frame.

  • When separating the adhesive, don't insert your tool more than 3 mm under the back glass to avoid damaging the internal components.

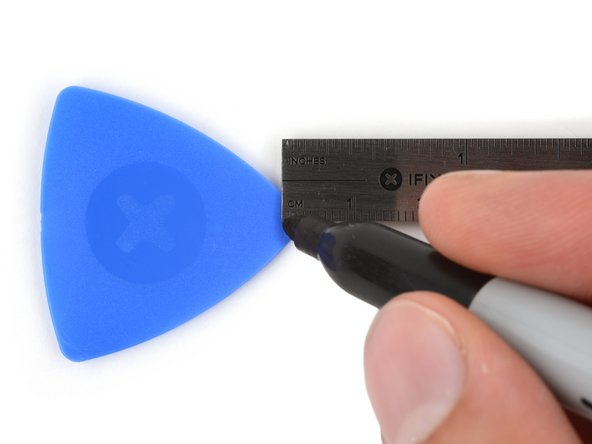
  • To help, measure and mark 3 mm from the tip of an opening pick with a permanent marker.

  • If your screen or back glass is badly cracked, a suction cup may not perfectly adhere.

  • Lay overlapping strips of packing tape over the glass to protect yourself and make disassembly easier. Ensure there's a smooth area near the bottom edge that's large and smooth enough for a suction cup to stick to.

El adhesivo fija el perímetro del vidrio trasero al marco.

Cuando separas el adhesivo, no introduzcas la herramienta más de 3 mm por debajo del vidrio trasero para evitar dañar los componentes internos.

Para ayudar, mide y marca 3 mm desde la punta de una púa de apertura con un marcador permanente.

Si la pantalla o el vidrio trasero están muy agrietados, es posible que la ventosa no se adhiera perfectamente.

Coloca tiras superpuestas de cinta de embalaje sobre el vidrio para protegerte y facilitar el desmontaje. Asegúrate de que haya un área lisa cerca del borde inferior que sea lo suficientemente grande y lisa como para que se adhiera una ventosa.

crwdns2944171:0crwdnd2944171:0crwdnd2944171:0crwdnd2944171:0crwdne2944171:0