crwdns2933423:0crwdne2933423:0

Google Pixel 9 - リアカメラモジュールの交換

crwdns2936315:0crwdne2936315:0
crwdns2936323:0crwdne2936323:0
crwdns2931653:02crwdne2931653:0
Google Pixel 9 Rear Camera Module Replacement, Install new flash module adhesive: crwdns2935265:00crwdnd2935265:01crwdnd2935265:03crwdne2935265:0 Google Pixel 9 Rear Camera Module Replacement, Install new flash module adhesive: crwdns2935265:00crwdnd2935265:02crwdnd2935265:03crwdne2935265:0 Google Pixel 9 Rear Camera Module Replacement, Install new flash module adhesive: crwdns2935265:00crwdnd2935265:03crwdnd2935265:03crwdne2935265:0
Install new flash module adhesive
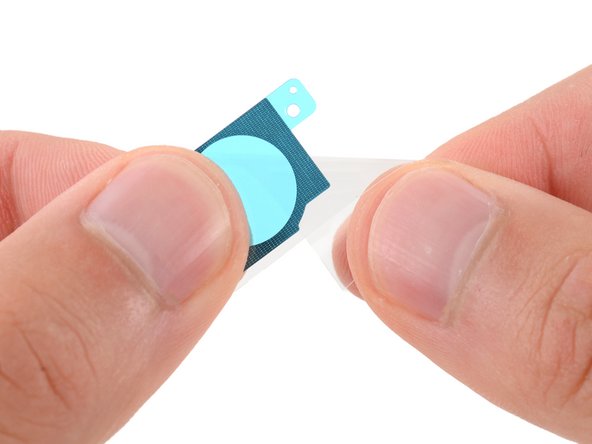
  • Use a spudger and tweezers to remove the two pieces of adhesive from the bottom of the LDAF and flash module.

  • Remove the larger clear liners from one of the flash module adhesives.

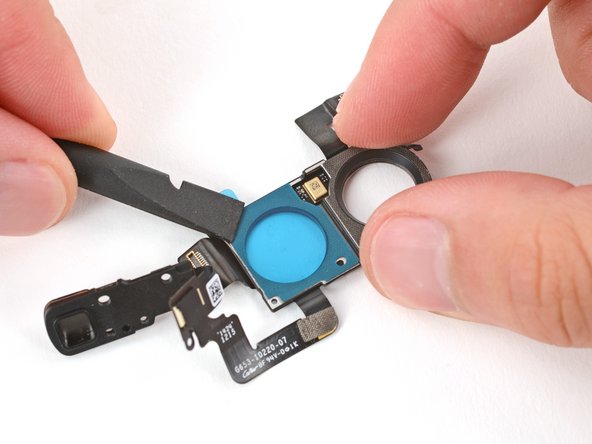
  • Place the adhesive into place on the bottom of the module and press down firmly with the flat end of a spudger to secure the adhesive.

  • Repeat the process to apply the other piece of flash adhesive.

  • Remove the two remaining blue liners.

スパッジャーとピンセットを用いて、LDAF(レーザー検知オートフォーカス)センサーとフラッシュモジュールの背面にある接着剤を取り外します。

二つあるフラッシュモジュール用接着剤のうち、片方から青い保護膜をはがします。

接着剤をモジュール下部の切り抜き部分に設置し、スパッジャーの先で軽く押して固定してください。

上記の手順を繰り返して、もう片方の接着剤もモジュールに固定します。

残りの二つの青い保護膜をはがします。

crwdns2944171:0crwdnd2944171:0crwdnd2944171:0crwdnd2944171:0crwdne2944171:0