crwdns2933423:0crwdne2933423:0

Changement carte de gestion de charge HMD Skyline

crwdns2931527:0crwdnd2931527:0crwdnd2931527:0crwdnd2931527:0crwdne2931527:0

crwdns2935425:05crwdne2935425:0

crwdns2936315:0crwdne2936315:0
crwdns2936317:0crwdne2936317:0
crwdns2931653:05crwdne2931653:0
HMD Skyline Charging Board Replacement: crwdns2935265:00crwdnd2935265:01crwdnd2935265:03crwdne2935265:0 HMD Skyline Charging Board Replacement: crwdns2935265:00crwdnd2935265:02crwdnd2935265:03crwdne2935265:0 HMD Skyline Charging Board Replacement: crwdns2935265:00crwdnd2935265:03crwdnd2935265:03crwdne2935265:0
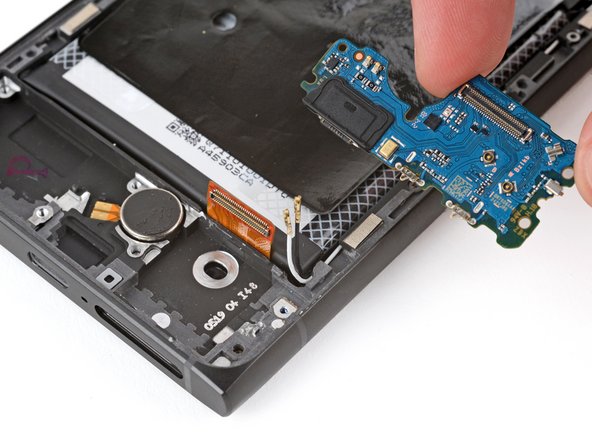
  • Lift the top edge of the board and remove it.

  • During reassembly:

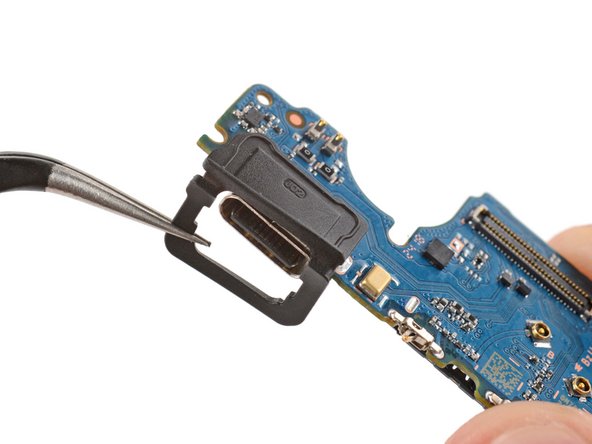
  • Make sure your USB‑C port has a rubber gasket around it. If it doesn't, transfer the gasket from your old board, making sure the side with a cutout goes on the bottom.

  • Insert the board at a downward angle so the USB‑C port goes into its cutout.

  • Make sure none of the cables on the top edge get stuck under the board.

  • Press down on the top edge of the board to engage its clip.

Soulevez le bord supérieur de la carte et retirez-la.

Lors du remontage :

Assurez-vous que votre port USB-C est entouré d'un joint en caoutchouc. Si ce n'est pas le cas, transférez le joint de votre ancienne carte, en veillant à ce que le côté avec une découpe soit placé en bas.

Insérez la carte en l'inclinant vers le bas, de manière à ce que le port USB-C s'insère dans sa découpe.

Assurez-vous qu'aucun des câbles situés sur le bord supérieur ne reste coincé sous la carte.

Appuyez sur le bord supérieur de la carte pour engager son clip.

crwdns2944171:0crwdnd2944171:0crwdnd2944171:0crwdnd2944171:0crwdne2944171:0