crwdns2933423:0crwdne2933423:0

Reemplazo de la placa de carga del HMD Skyline

crwdns2931527:0crwdnd2931527:0crwdnd2931527:0crwdnd2931527:0crwdne2931527:0

crwdns2935425:05crwdne2935425:0

crwdns2936315:0crwdne2936315:0
crwdns2936331:0crwdne2936331:0
crwdns2931653:05crwdne2931653:0
HMD Skyline Charging Board Replacement: crwdns2935265:00crwdnd2935265:01crwdnd2935265:03crwdne2935265:0 HMD Skyline Charging Board Replacement: crwdns2935265:00crwdnd2935265:02crwdnd2935265:03crwdne2935265:0 HMD Skyline Charging Board Replacement: crwdns2935265:00crwdnd2935265:03crwdnd2935265:03crwdne2935265:0
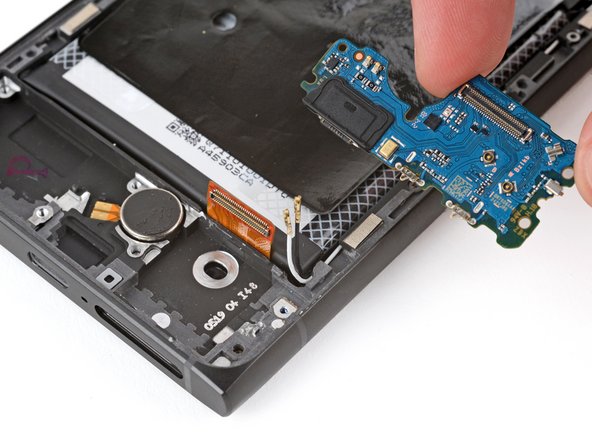
  • Lift the top edge of the board and remove it.

  • During reassembly:

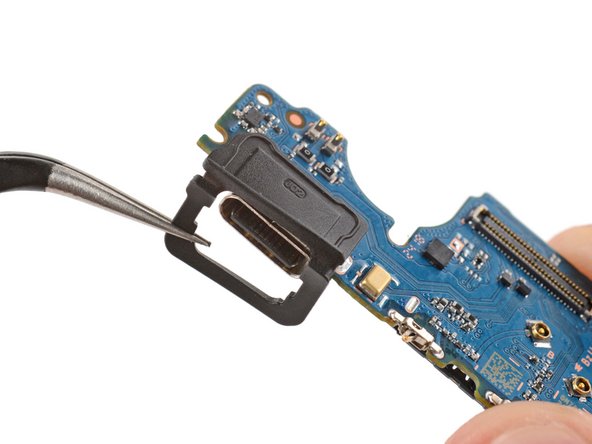
  • Make sure your USB‑C port has a rubber gasket around it. If it doesn't, transfer the gasket from your old board, making sure the side with a cutout goes on the bottom.

  • Insert the board at a downward angle so the USB‑C port goes into its cutout.

  • Make sure none of the cables on the top edge get stuck under the board.

  • Press down on the top edge of the board to engage its clip.

Levanta el borde superior de la placa y retírala.

Durante el montaje:

Asegúrate de que el puerto USB-C tiene una junta de goma alrededor. Si no lo tiene, transfiere la junta de tu antigua placa, asegurándote de que el lado con un recorte va en la parte inferior.

Inserta la placa en ángulo descendente para que el puerto USB-C entre en su recorte.

Asegúrate de que ninguno de los cables del borde superior quede atascado bajo la placa.

Presiona hacia abajo el borde superior de la placa para enganchar su clip.

crwdns2944171:0crwdnd2944171:0crwdnd2944171:0crwdnd2944171:0crwdne2944171:0