crwdns2933423:0crwdne2933423:0

Google Pixel 8aのバッテリー交換

crwdns2936315:0crwdne2936315:0
crwdns2936323:0crwdne2936323:0
crwdns2931653:08crwdne2931653:0
Google Pixel 8a Battery Replacement, Reassembly instructions: crwdns2935265:00crwdnd2935265:01crwdnd2935265:03crwdne2935265:0 Google Pixel 8a Battery Replacement, Reassembly instructions: crwdns2935265:00crwdnd2935265:02crwdnd2935265:03crwdne2935265:0 Google Pixel 8a Battery Replacement, Reassembly instructions: crwdns2935265:00crwdnd2935265:03crwdnd2935265:03crwdne2935265:0
Reassembly instructions
  • The next three steps show how to apply new adhesive and install your replacement battery.

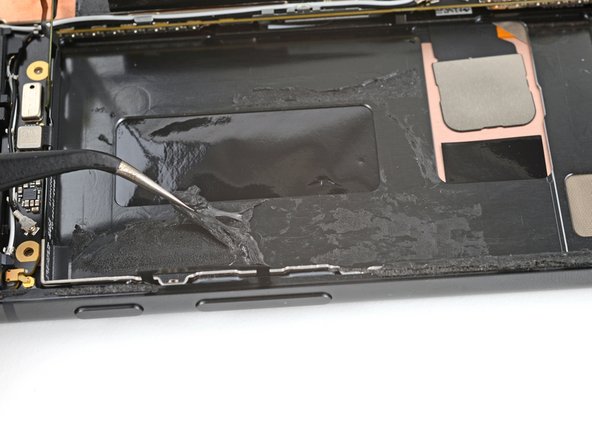
  • Use the flat end of your spudger to scrape an edge of the old adhesive into a ball large enough to grip with a pair of tweezers.

  • Use tweezers or your fingers to peel and remove the old adhesive from the frame.

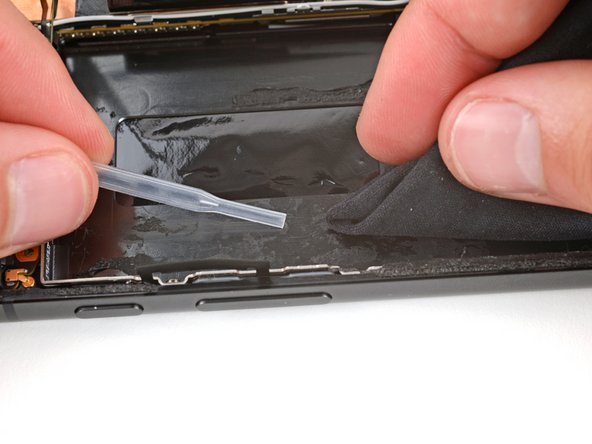
  • Apply a few drops of highly-concentrated isopropyl alcohol (over 90%) to any adhesive residue and wipe it with a lint-free or microfiber cloth.

ここからの3手順は、新しい接着剤を取り付けて交換用バッテリーを組み込む方法について説明しています。

スパッジャーの平らな方の先を使って、古い接着剤の端を擦って丸めて、ピンセットで掴むのに十分な大きさにします。

ピンセットや指を使って古い接着剤をフレームから剥がして取り除きます。

高純度(90%以上)のイソプロピルアルコールを数滴、残っている接着剤に塗布してから、無塵布やマイクロファイバークロスで拭き取ります。

crwdns2944171:0crwdnd2944171:0crwdnd2944171:0crwdnd2944171:0crwdne2944171:0