crwdns2933423:0crwdne2933423:0

Reemplazo de la batería del Google Pixel 8a

crwdns2936315:0crwdne2936315:0
crwdns2936331:0crwdne2936331:0
crwdns2931653:08crwdne2931653:0
Google Pixel 8a Battery Replacement, Reassembly instructions: crwdns2935265:00crwdnd2935265:01crwdnd2935265:03crwdne2935265:0 Google Pixel 8a Battery Replacement, Reassembly instructions: crwdns2935265:00crwdnd2935265:02crwdnd2935265:03crwdne2935265:0 Google Pixel 8a Battery Replacement, Reassembly instructions: crwdns2935265:00crwdnd2935265:03crwdnd2935265:03crwdne2935265:0
Reassembly instructions
  • The next three steps show how to apply new adhesive and install your replacement battery.

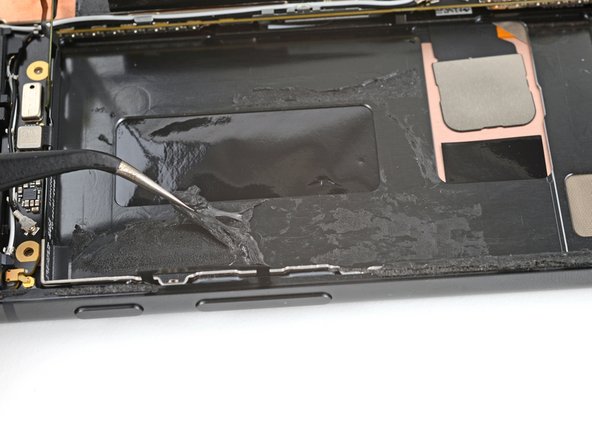
  • Use the flat end of your spudger to scrape an edge of the old adhesive into a ball large enough to grip with a pair of tweezers.

  • Use tweezers or your fingers to peel and remove the old adhesive from the frame.

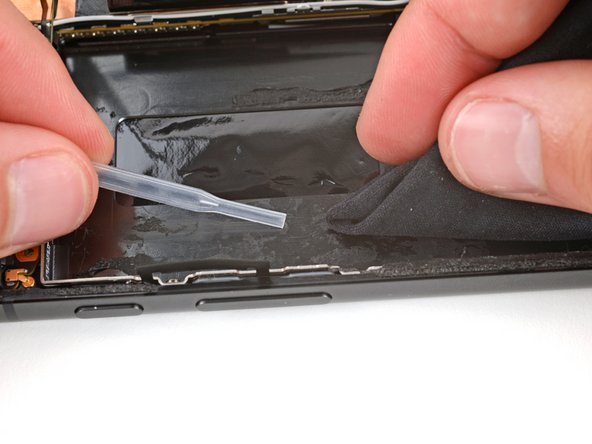
  • Apply a few drops of highly-concentrated isopropyl alcohol (over 90%) to any adhesive residue and wipe it with a lint-free or microfiber cloth.

Los tres pasos siguientes muestran cómo aplicar el nuevo adhesivo e instalar la batería de reemplazo.

Utiliza el extremo plano de tu spudger para raspar un borde del adhesivo viejo y formar una bola lo suficientemente grande como para agarrarla con unas pinzas.

Utiliza pinzas o los dedos para despegar y retirar el adhesivo viejo del marco.

Aplica unas gotas de alcohol isopropílico muy concentrado (más del 90%) sobre cualquier resto de adhesivo y límpialo con un paño sin pelusas o de microfibra.

crwdns2944171:0crwdnd2944171:0crwdnd2944171:0crwdnd2944171:0crwdne2944171:0