crwdns2933423:0crwdne2933423:0

Gerissenes Gurtband von einem Schlafsack reparieren

crwdns2936315:0crwdne2936315:0
crwdns2936319:0crwdne2936319:0
crwdns2931653:05crwdne2931653:0
How to Repair a Broken Webbing in a Sleeping Bag, Check the strength of the bag: crwdns2935265:00crwdnd2935265:01crwdnd2935265:02crwdne2935265:0 How to Repair a Broken Webbing in a Sleeping Bag, Check the strength of the bag: crwdns2935265:00crwdnd2935265:02crwdnd2935265:02crwdne2935265:0
Check the strength of the bag
  • Check the repair strength by pulling an unbroken strap gently, and then pulling the repaired strap in the same way.

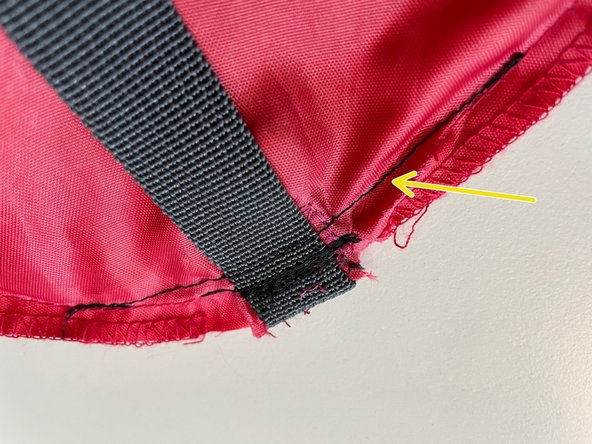
  • When pulling the repaired strap, if it looks weak or strained, repeat step 4 again and add some additional stitching on the sewing machine (yellow arrow).

  • Turn the bag back the correct way, and stuff the sleeping bag back in. If it looks unstrained and strong, you're ready to go!

  • Note: it is normal for the repaired strap to be 5-10mm shorter after the repair, and this may be noticeable when the bag is packed.

Prüfe deine Naht. indem du einen unbeschädigten Gurt sanft ziehst und dann den reparierten Gurt auf die gleiche Weise ziehst.

Wenn der reparierte Gurt locker oder überlastet aussieht, wiederhole Schritt 4 und füge zusätzliche Nähte auf der Nähmaschine hinzu (gelber Pfeil).

Drehe den Beutel wieder richtig auf rechts und stopfe den Schlafsack hinein. Wenn er stabil und stark aussieht, ist er fertig repariert!

Hinweis: Es ist normal, dass der reparierte Gurt nach der Reparatur um 5-10 mm kürzer ist, was eventuell auffällt, wenn der Schlafsack im Beutel verpackt ist.

crwdns2944171:0crwdnd2944171:0crwdnd2944171:0crwdnd2944171:0crwdne2944171:0