crwdns2933423:0crwdne2933423:0

Stoffriss in einem Schlafsack flicken

crwdns2936315:0crwdne2936315:0
crwdns2936319:0crwdne2936319:0
crwdns2931653:03crwdne2931653:0
How to Patch a Fabric Tear in a Sleeping Bag, Stick the patch over the hole: crwdns2935265:00crwdnd2935265:01crwdnd2935265:03crwdne2935265:0 How to Patch a Fabric Tear in a Sleeping Bag, Stick the patch over the hole: crwdns2935265:00crwdnd2935265:02crwdnd2935265:03crwdne2935265:0 How to Patch a Fabric Tear in a Sleeping Bag, Stick the patch over the hole: crwdns2935265:00crwdnd2935265:03crwdnd2935265:03crwdne2935265:0
Stick the patch over the hole
  • Note: this step is much easier with two people!

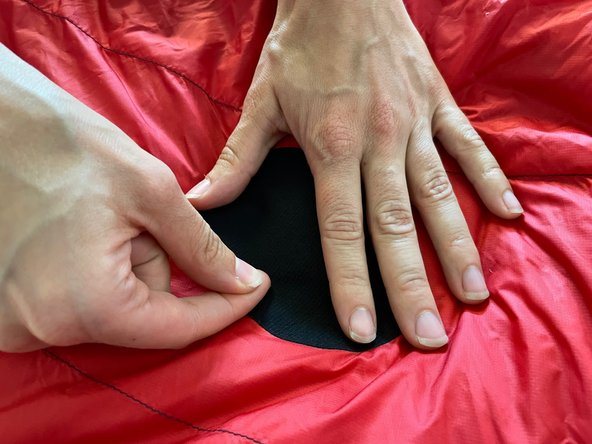
  • Flatten the area around the hole by pulling the material to each side, and pushing down on the stuffing. The goal is to make this area as flat and smooth as possible, and with the tear hole as closed as possible.

  • Tip: when flattening, down/stuffing may come out. Make sure to remove this from the repair area before attaching the patch.

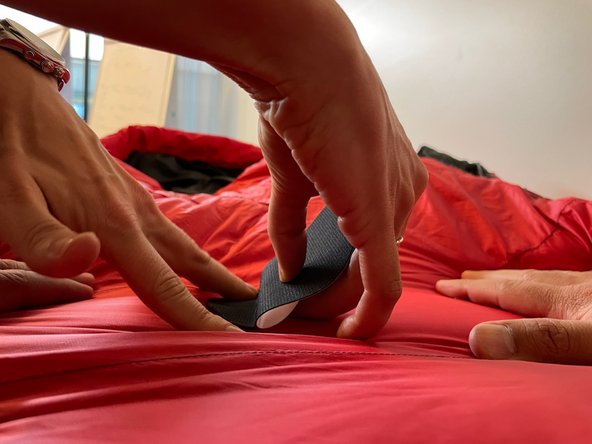
  • While one person keeps the area flat, the other person places the first side of the patch onto the sleeping bag. Keeping even pressure and with a slow and careful movement, peel off the backing paper at the same time as pressing the patch onto the product. This is very similar to applying a first-aid plaster.

  • When the patch is fully applied, smooth out any wrinkles or bubbles with the back of your nail. The goal is to have a fully flat patch, with no creases or spaces for dust to get in, or down/stuffing to leak out.

Hinweis: Dieser Schritt lässt sich mit einer zweiten Person als Unterstützung besser vollziehen.

Glätte den Bereich um das Loch, indem du das Material zu beiden Seiten ziehst und die Füllung nach unten drückst. Ziel ist es, diesen Bereich so flach und glatt wie möglich zu machen und das Reißloch so gut wie möglich zu verschließen.

Tipp: Beim Glätten können Daunen/Füllstoffe austreten. Achte darauf, diese vor dem Anbringen des Flickens zu entfernen.

Während eine Person die Fläche flach hält, legt die andere Person die erste Seite des Flickens auf den Schlafsack. Ziehe mit gleichmäßigem Druck und einer langsamen und vorsichtigen Bewegung das Trägerpapier ab, während du das Pflaster auf das Produkt drückst - ähnlich wie beim Anbringen eines Erste-Hilfe-Pflasters.

Wenn das Flicken vollständig aufgeklebt ist, glätte alle Falten oder Blasen mit der Rückseite deines Fingernagels. Das Ziel ist ein völlig flaches Pflaster, ohne Falten oder Zwischenräume, in die Staub eindringen oder Flaum austreten könnten.

crwdns2944171:0crwdnd2944171:0crwdnd2944171:0crwdnd2944171:0crwdne2944171:0