crwdns2935425:03crwdne2935425:0


-
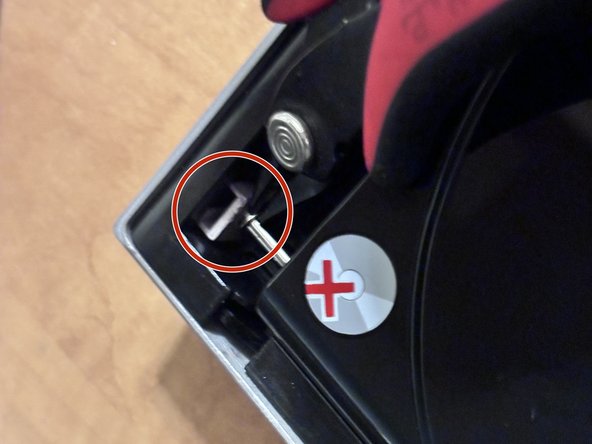
Pop out the C-clip in the rear of the machine, attaching the rail to the motor mount.
-
Pop out the C-clip in the front of the machine on the opposite rail, attaching the rail to the chassis.
-
Once the C-clips are removed, simply slide each rail in the direction that was freed by the C-clip, and it should dislodge the opposite end, which allows you to pivot the rod and completely remove the rod.
-
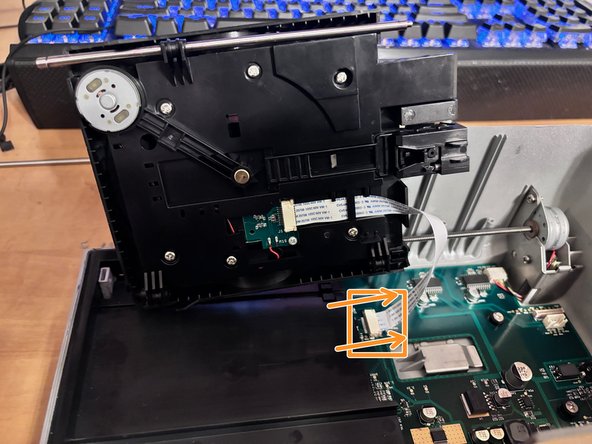
Tilt the print bed mechanism on its side, revealing the ribbon connector to the main board.
-
To unlock the ribbon connector on the board, slide the locking tabs towards the back, parallel to the board, at the same time. They should move approximately 1-2mm, and the ribbon cable should then move freely within the socket, requiring no force to remove it, as it is a zero insertion force (ZIF) connection.
crwdns2944171:0crwdnd2944171:0crwdnd2944171:0crwdnd2944171:0crwdne2944171:0