crwdns2935425:012crwdne2935425:0
crwdns2931653:012crwdne2931653:0


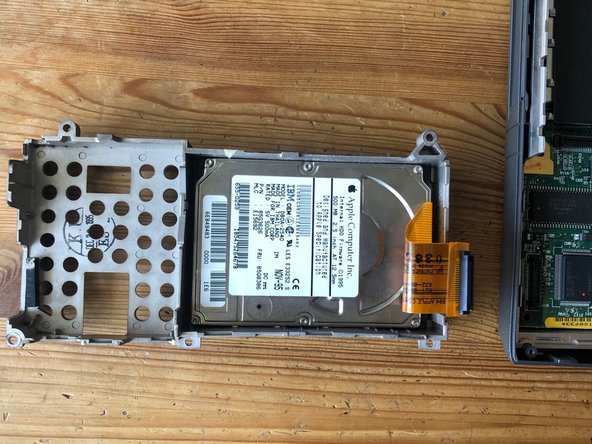


hard disk cage removal
-
carefully lay the the hard disk cage on its back to the left of the powerbook case, because the hard disk still is attached to the mainboard. Then pull out the connector of the hard disk.
crwdns2944171:0crwdnd2944171:0crwdnd2944171:0crwdnd2944171:0crwdne2944171:0