crwdns2935425:08crwdne2935425:0
crwdns2931653:08crwdne2931653:0

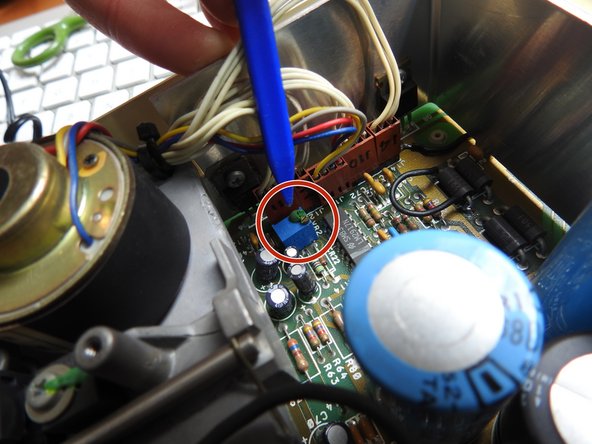


Calibrate the motor speed
-
Chances are your drive is in working condition by now, ready to take the new 12v power supply. So, plug it in and give it a go!
-
At this point, the speed of the spinning motor may be slightly altered. So let's take care of that in this step.
-
Locate the adjusting trimpot. There is a chance it comes with silicon coating on top. Break it off gently with your hemostats until you can access the small brass screw with a flat screwdriver.
-
Load your 1050 diagnostic diskette and adjust the trimpot to the desired speed.
crwdns2944171:0crwdnd2944171:0crwdnd2944171:0crwdnd2944171:0crwdne2944171:0