crwdns2935425:03crwdne2935425:0
crwdns2931653:03crwdne2931653:0


Prepare the drive
-
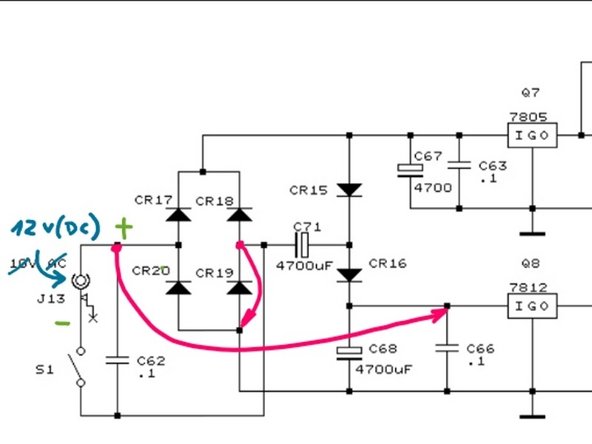
Take a look at the diagram: You are about to add the two jumper wires highlighted in red.
-
Prepare your Atari 1050 on a clean surface. Put a towel on top of the table to prevent scratches to the unit.
-
Remove all 6 philips screws on the underside of the unit
-
Flip the unit back on its feet and carefully remove both the top and front cover as if they were one single piece. Be gentle: This plastic is over 40 years old.
-
Place the drive in a way the SIO connectors are facing away from you and the front panel is facing you.
crwdns2944171:0crwdnd2944171:0crwdnd2944171:0crwdnd2944171:0crwdne2944171:0