crwdns2933423:0crwdne2933423:0

プレイステーション4スリム ディスクローラー交換

crwdns2935425:012crwdne2935425:0

crwdns2936315:0crwdne2936315:0
crwdns2936323:0crwdne2936323:0
crwdns2931653:012crwdne2931653:0
PlayStation 4 Slim Disc Rollers Replacement: crwdns2935265:00crwdnd2935265:01crwdnd2935265:03crwdne2935265:0 PlayStation 4 Slim Disc Rollers Replacement: crwdns2935265:00crwdnd2935265:02crwdnd2935265:03crwdne2935265:0 PlayStation 4 Slim Disc Rollers Replacement: crwdns2935265:00crwdnd2935265:03crwdnd2935265:03crwdne2935265:0
  • To return the rollers back into position, first place the left roller back, connecting to the white gear, and push down until you hear a click.

  • Make sure the larger black end is facing the small white connector rod for both rollers.

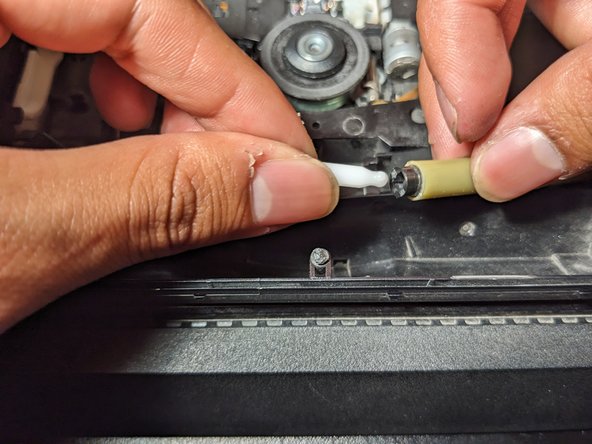
  • Align the ends of the white connector rod to the holes at the end of the right roller. Then place the right side of the right roller down first so you can connect the left roller to the white connector rod.

  • Push down between the white connector rod and the right roller until you hear a click.

ローラーを元の位置に戻すには、まず左側のローラーを白いギアに接続して戻し、カチッという音が聞こえるまで押し下げます。

両方のローラーの黒い大きい端が小さい白いコネクタ ロッドに面していることを確認します。

白いコネクタ ロッドの端を右側のローラーの端にある穴に合わせます。次に、左側のローラーを白いコネクタ ロッドに接続できるように、最初に右側のローラーの右側を下に置きます。

白いコネクタロッドと右側のローラーの間を、カチッと音がするまで押し下げます。

crwdns2944171:0crwdnd2944171:0crwdnd2944171:0crwdnd2944171:0crwdne2944171:0