crwdns2933423:0crwdne2933423:0

HP Pavilion 15 dyl1087nr Screen Replacement

crwdns2936315:0crwdne2936315:0
crwdns2936321:0crwdne2936321:0
crwdns2931653:05crwdne2931653:0
HP Pavilion 15 dyl1087nr Screen Replacement: crwdns2935265:00crwdnd2935265:01crwdnd2935265:03crwdne2935265:0 HP Pavilion 15 dyl1087nr Screen Replacement: crwdns2935265:00crwdnd2935265:02crwdnd2935265:03crwdne2935265:0 HP Pavilion 15 dyl1087nr Screen Replacement: crwdns2935265:00crwdnd2935265:03crwdnd2935265:03crwdne2935265:0
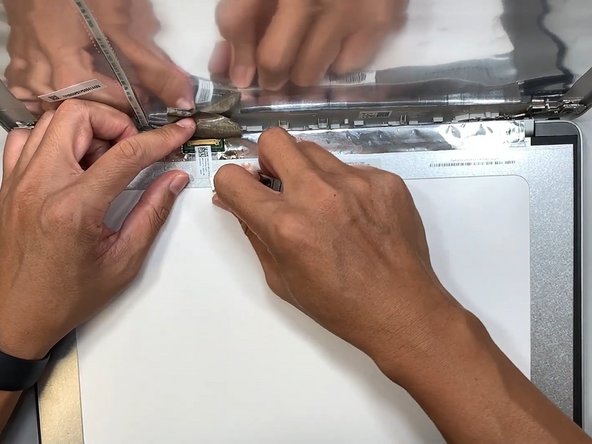
  • Remove the tape covering the display cable connector.

  • Use your spudger to detach the display cable connector. First, gently push the tip of a spudger under the metal buckle to unclip it, then swing it over the socket.

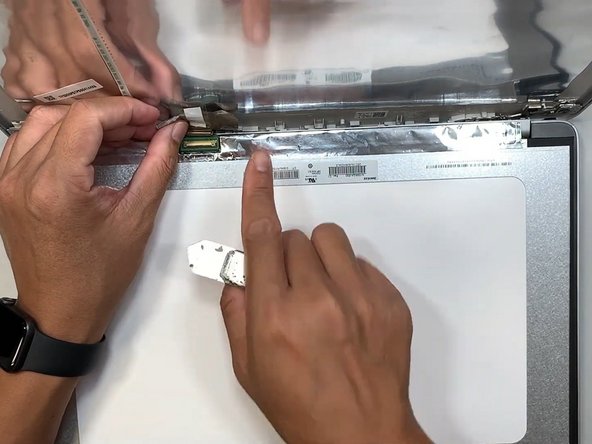
  • Next, hold the buckle and cable together and gently pull the connector straight out of its socket.

  • Grip the cable and buckle together and insert the connector fully into its socket.

  • Aligning the connector can be tricky. Reposition it as necessary and don't try to force it into the socket, or you may damage both the connector and its socket.

  • Flip the buckle over the socket and use a spudger to press the buckle down until it clicks into place.

crwdns2935429:0crwdne2935429:0

crwdns2935429:0crwdne2935429:0

crwdns2935429:0crwdne2935429:0

crwdns2935429:0crwdne2935429:0

crwdns2935429:0crwdne2935429:0

crwdns2935429:0crwdne2935429:0

crwdns2944171:0crwdnd2944171:0crwdnd2944171:0crwdnd2944171:0crwdne2944171:0