crwdns2933423:0crwdne2933423:0

Surepet Surefeed Microchip Futterautomat Motorkassette reparieren

crwdns2936315:0crwdne2936315:0
crwdns2936319:0crwdne2936319:0
crwdns2931653:07crwdne2931653:0
Disassembling Surepet Surefeed Microchip Pet Feeder Motor cartridge, Reassemble (with additional information): crwdns2935265:00crwdnd2935265:01crwdnd2935265:03crwdne2935265:0 Disassembling Surepet Surefeed Microchip Pet Feeder Motor cartridge, Reassemble (with additional information): crwdns2935265:00crwdnd2935265:02crwdnd2935265:03crwdne2935265:0 Disassembling Surepet Surefeed Microchip Pet Feeder Motor cartridge, Reassemble (with additional information): crwdns2935265:00crwdnd2935265:03crwdnd2935265:03crwdne2935265:0
Reassemble (with additional information)
  • Follow the guide in reverse to re-assemble. Please note the special instructions for undoing steps 3 and 2.

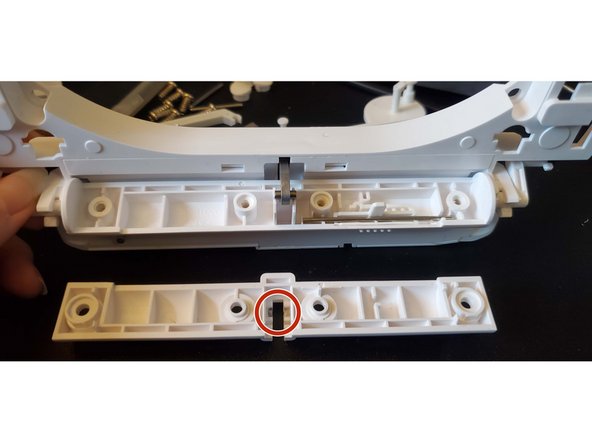
  • Step 3: The short, thick pin that goes through the linkage from the motor needs to sit inside notches on both halves of the cylindrical rotating piece. After clipping the cylinder onto the cartridge make sure the pin sits in the notch shown in the first photo. (Also make sure you put the lid release latch and pin back in)

  • Hold the cylinder as seen in the second photo, and drop the cylinder lid so that the lid's notch is also aligned with the pin. Screw it in place.

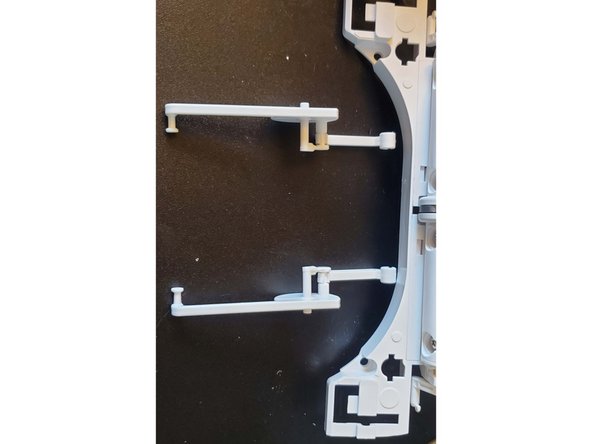
  • Step 2: these arms have a left side and a right side. Line them up as shown in the third photo so you don't get them on backwards.

Folge den Schritten in umgekehrter Reihenfolge. Beachte die besonderen Hinweise bei Schritt 2 und 3.

Schritt 3: der kurze dicke Stift der an der Verbindungsstelle des Motors ist muss in Kerben auf beiden Hälften des drehbaren Zylinders sitzen. Achte darauf, dass der Stift nach dem Einrasten des Zylinders in die Kassette der Stift in der in Bild 1 gezeigten Kerbe sitzt. Vergiss nicht den Öffnungsriegel zusammen mit seinem Stift wieder einzubauen.

Halte den Zylinder so, wie in Bild 2 gezeigt und senke die Abdeckung des Zylinders so ab, dass die Kerbe in den Stift passt. Schraube die Abdeckung wieder fest.

Schritt 2: diese Arme haben eine rechte und eine linke Seite. Richte sie so aus, wie in Bild 3 zu sehen, damit sie nicht verkehrt herum sind.

crwdns2944171:0crwdnd2944171:0crwdnd2944171:0crwdnd2944171:0crwdne2944171:0