crwdns2933423:0crwdne2933423:0

Sostituzione assemblaggio schermo e telaio HMD Pulse+

crwdns2931529:0crwdnd2931529:0crwdnd2931529:0crwdnd2931529:02crwdnd2931529:0crwdne2931529:0

crwdns2935425:01crwdne2935425:0

crwdns2936315:0crwdne2936315:0
crwdns2936321:0crwdne2936321:0
crwdns2931653:01crwdne2931653:0
HMD Pulse+ Screen and Frame Assembly Replacement, Remove the loudspeaker: crwdns2935265:00crwdnd2935265:01crwdnd2935265:03crwdne2935265:0 HMD Pulse+ Screen and Frame Assembly Replacement, Remove the loudspeaker: crwdns2935265:00crwdnd2935265:02crwdnd2935265:03crwdne2935265:0 HMD Pulse+ Screen and Frame Assembly Replacement, Remove the loudspeaker: crwdns2935265:00crwdnd2935265:03crwdnd2935265:03crwdne2935265:0
Remove the loudspeaker
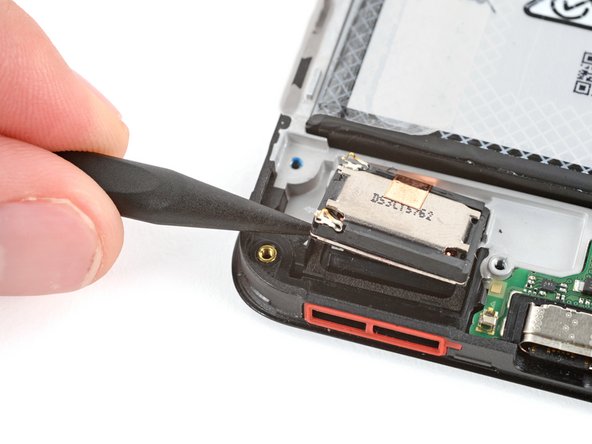
  • Insert the point of a spudger under the bottom left corner of the loudspeaker and pry it up.

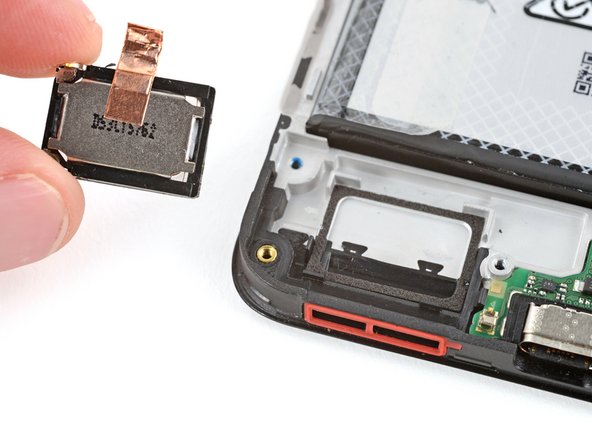
  • Remove the loudspeaker.

  • During reassembly:

  • Remove the plastic liner from the loudspeaker adhesive on your replacement screen and frame assembly.

  • Push the speaker into place so the metal contacts are on the left edge.

Inserisci la punta di uno spudger sotto l'angolo inferiore sinistro dell'altoparlante e fai leva.

Rimuovi l'altoparlante.

Durante il rimontaggio:

Rimuovi la pellicola di plastica dall'adesivo dell'altoparlante sul tuo assemblaggio di schermo e telaio sostitutivo.

Spingi l'altoparlante in posizione così che i contatti di metallo siano sul bordo sinistro.

crwdns2944171:0crwdnd2944171:0crwdnd2944171:0crwdnd2944171:0crwdne2944171:0