crwdns2933423:0crwdne2933423:0

Changement ensemble écran et châssis HMD Pulse+

crwdns2931529:0crwdnd2931529:0crwdnd2931529:0crwdnd2931529:02crwdnd2931529:0crwdne2931529:0

crwdns2935425:01crwdne2935425:0

crwdns2936315:0crwdne2936315:0
crwdns2936317:0crwdne2936317:0
crwdns2931653:01crwdne2931653:0
HMD Pulse+ Screen and Frame Assembly Replacement, Remove the loudspeaker: crwdns2935265:00crwdnd2935265:01crwdnd2935265:03crwdne2935265:0 HMD Pulse+ Screen and Frame Assembly Replacement, Remove the loudspeaker: crwdns2935265:00crwdnd2935265:02crwdnd2935265:03crwdne2935265:0 HMD Pulse+ Screen and Frame Assembly Replacement, Remove the loudspeaker: crwdns2935265:00crwdnd2935265:03crwdnd2935265:03crwdne2935265:0
Remove the loudspeaker
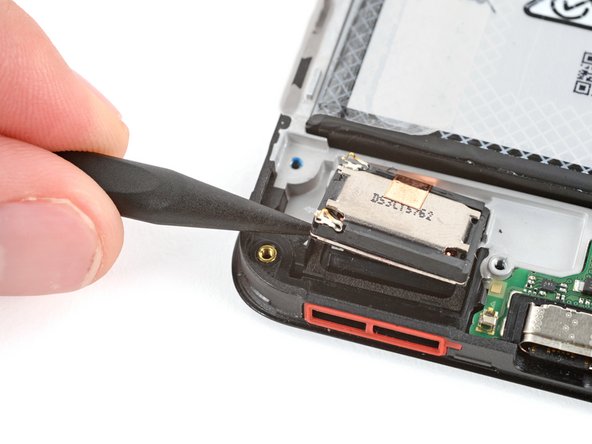
  • Insert the point of a spudger under the bottom left corner of the loudspeaker and pry it up.

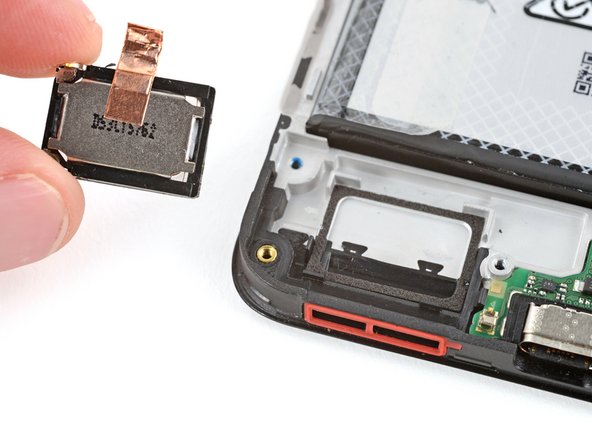
  • Remove the loudspeaker.

  • During reassembly:

  • Remove the plastic liner from the loudspeaker adhesive on your replacement screen and frame assembly.

  • Push the speaker into place so the metal contacts are on the left edge.

Insérez la pointe d'une spatule sous le coin inférieur gauche du haut-parleur et soulevez-le en faisant levier.

Retirez le haut-parleur.

Lors du remontage :

Retirez le revêtement en plastique de l'adhésif du haut-parleur sur votre ensemble écran et châssis de changement.

Poussez le haut-parleur en place de manière à ce que les contacts métalliques se trouvent sur le bord gauche.

crwdns2944171:0crwdnd2944171:0crwdnd2944171:0crwdnd2944171:0crwdne2944171:0