crwdns2933423:0crwdne2933423:0

HMD Pulse+ Display und Rahmen (Baugruppe)

crwdns2931529:0crwdnd2931529:0crwdnd2931529:0crwdnd2931529:02crwdnd2931529:0crwdne2931529:0

crwdns2935425:01crwdne2935425:0

crwdns2936315:0crwdne2936315:0
crwdns2936319:0crwdne2936319:0
crwdns2931653:01crwdne2931653:0
HMD Pulse+ Screen and Frame Assembly Replacement, Remove the loudspeaker: crwdns2935265:00crwdnd2935265:01crwdnd2935265:03crwdne2935265:0 HMD Pulse+ Screen and Frame Assembly Replacement, Remove the loudspeaker: crwdns2935265:00crwdnd2935265:02crwdnd2935265:03crwdne2935265:0 HMD Pulse+ Screen and Frame Assembly Replacement, Remove the loudspeaker: crwdns2935265:00crwdnd2935265:03crwdnd2935265:03crwdne2935265:0
Remove the loudspeaker
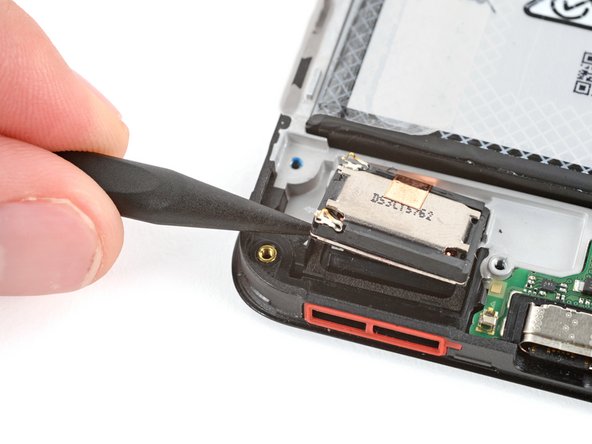
  • Insert the point of a spudger under the bottom left corner of the loudspeaker and pry it up.

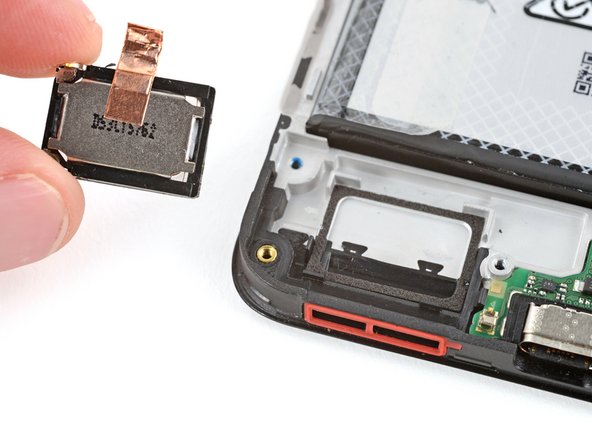
  • Remove the loudspeaker.

  • During reassembly:

  • Remove the plastic liner from the loudspeaker adhesive on your replacement screen and frame assembly.

  • Push the speaker into place so the metal contacts are on the left edge.

Setze die Spitze eines Spudgers unter die linke untere Ecke des Lautsprechers und heble ihn hoch.

Baue den Lautsprecher aus.

Beim Wiederzusammenbau:

Entferne die Kunststofffolie vom Lautsprecherkleber an deiner Austausch-Baugruppe aus Display und Rahmen.

Setze den Lautsprecher so ein, dass sich die Metallkontakte an der linken Kante befinden.

crwdns2944171:0crwdnd2944171:0crwdnd2944171:0crwdnd2944171:0crwdne2944171:0