crwdns2933423:0crwdne2933423:0

Changement moteur à vibration PlayStation Portal

crwdns2935425:06crwdne2935425:0

crwdns2936315:0crwdne2936315:0
crwdns2936317:0crwdne2936317:0
crwdns2931653:06crwdne2931653:0
PlayStation Portal Vibration Motor Replacement, Reassembly information: crwdns2935265:00crwdnd2935265:01crwdnd2935265:03crwdne2935265:0 PlayStation Portal Vibration Motor Replacement, Reassembly information: crwdns2935265:00crwdnd2935265:02crwdnd2935265:03crwdne2935265:0 PlayStation Portal Vibration Motor Replacement, Reassembly information: crwdns2935265:00crwdnd2935265:03crwdnd2935265:03crwdne2935265:0
Reassembly information
  • During reassembly:

  • Remove any remaining adhesive residue from the frame and apply double-sided tape such as Tesa tape.

  • If you don't replace the adhesive, the vibration motor may shake loose and rattle during play.

  • Transfer any foam padding from your old motor to your replacement part.

  • Press the motor back into its recess and apply firm pressure for a minute to allow the adhesive to bond.

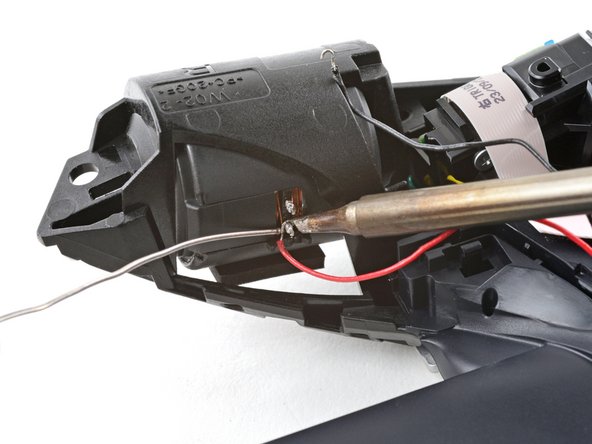
  • Solder the two wires to the new vibration motor.

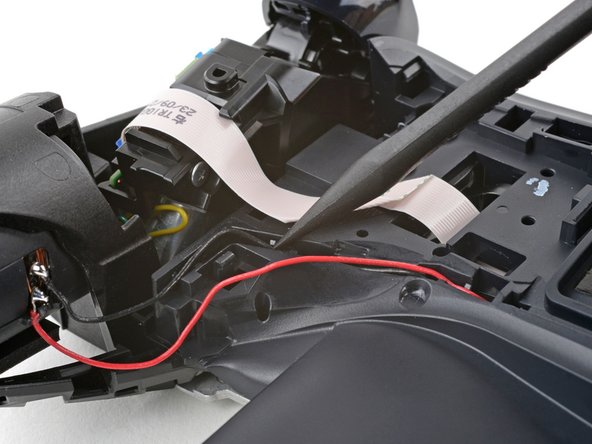
  • Use the point of a spudger to carefully tuck the motor wires back into the groove.

Lors du remontage :

Enlevez tout résidu de colle du châssis et appliquez du ruban adhésif double-face tel que le ruban Tesa.

Si vous ne remplacez pas l'adhésif, le moteur à vibration risque de se détacher et de cliqueter pendant que vous jouez.

Transférez le reste de rembourrage en mousse de l'ancien moteur sur la pièce de rechange.

Enfoncez le moteur dans son logement et exercez une pression ferme pendant une minute pour permettre à l'adhésif de bien se fixer.

Soudez les deux fils au nouveau moteur à vibration.

Utilisez la pointe d'une spatule pour remettre soigneusement les fils du moteur dans la rainure.

crwdns2944171:0crwdnd2944171:0crwdnd2944171:0crwdnd2944171:0crwdne2944171:0