crwdns2933423:0crwdne2933423:0

Extracción de la placa madre y el altavoz del auricular (Pro)

crwdns2931529:0crwdnd2931529:0crwdnd2931529:0crwdnd2931529:02crwdnd2931529:0crwdne2931529:0

crwdns2936315:0crwdne2936315:0
crwdns2936331:0crwdne2936331:0
crwdns2931653:06crwdne2931653:0
Motherboard and Earpiece Speaker Removal (Pro), Remove the motherboard: crwdns2935265:00crwdnd2935265:01crwdnd2935265:03crwdne2935265:0 Motherboard and Earpiece Speaker Removal (Pro), Remove the motherboard: crwdns2935265:00crwdnd2935265:02crwdnd2935265:03crwdne2935265:0 Motherboard and Earpiece Speaker Removal (Pro), Remove the motherboard: crwdns2935265:00crwdnd2935265:03crwdnd2935265:03crwdne2935265:0
Remove the motherboard
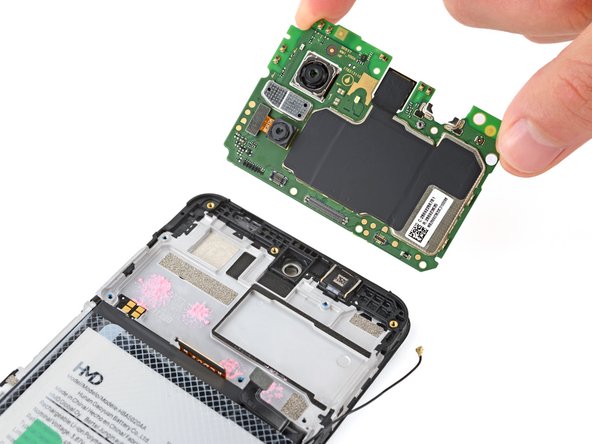
  • Lift and remove the motherboard.

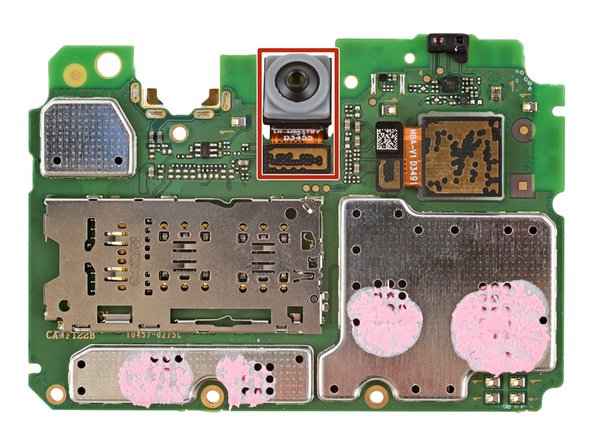
  • The front camera may have disconnected from the bottom of the board during removal. If it did, reconnect its press connector.

  • During reassembly:

  • Make sure the two press connectors on the bottom edge and the antenna cable on the right edge are out of the way so they don't get trapped underneath the board.

  • Lower the board into its recess and press down on the edges to clip it into place.

Levanta y retira la placa madre.

Es posible que la cámara frontal se haya desconectado de la parte inferior de la placa durante la extracción. Si lo hiciste, vuelve a conectar su conector de prensa.

Durante el montaje:

Asegúrate de que los dos conectores de prensa en el borde inferior y el cable de antena en el borde derecho están fuera del camino para que no queden atrapados debajo de la placa.

Introduce la placa en su hueco y presiona los bordes para fijarla.

crwdns2944171:0crwdnd2944171:0crwdnd2944171:0crwdnd2944171:0crwdne2944171:0