crwdns2935425:04crwdne2935425:0


-
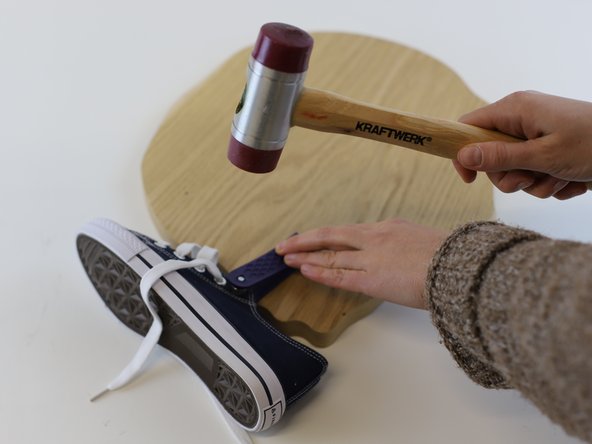
Take care: Check that the eyelet is located in the right place and that both metal rings are closely connected.
-
Start hammering! The goal is to connect the two halves together securely, but it isn't normally needed to apply lots of force. Use a soft tapping motion with the hammer and after a few taps the two halves should be connected.
-
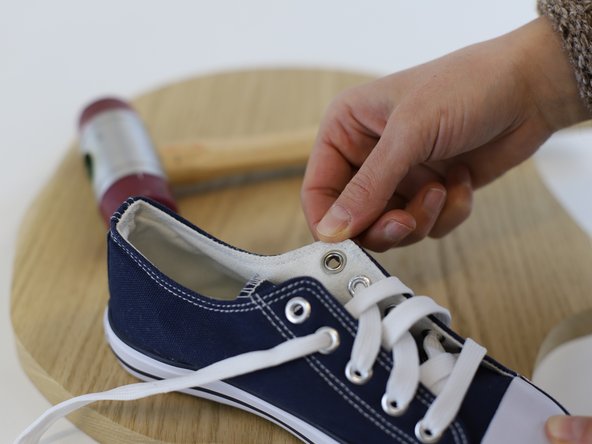
Gently open the punch tool and check whether the two halves have connected correctly. If not: close the tool and tap a few more times, until completed.
-
A correctly installed eyelet will be secure with no loose parts and no defects. Check the other eyelets for reference.
-
In case of defects, return to the beginning of this guide and remove the eyelet to try again.
| [title] Check and Reinsert the Lace | |
| [* black] ***Take care: ***Check that the eyelet is located in the right place and that both metal rings are closely connected. | |
| [* black] Start hammering! The goal is to connect the two halves together securely, but it isn't normally needed to apply lots of force. Use a soft tapping motion with the hammer and after a few taps the two halves should be connected. | |
| - | [* black] Gently open the punch tool and check whether the two halves have connected correctly. If not: close the tool and tap a few |
| + | [* black] Gently open the punch tool and check whether the two halves have connected correctly. If not: close the tool and tap a few more times, until completed. |
| [* black] A correctly installed eyelet will be secure with no loose parts and no defects. Check the other eyelets for reference. | |
| [* black] ''In case of defects, return to the beginning of this guide and remove the eyelet to try again.'' |
crwdns2944171:0crwdnd2944171:0crwdnd2944171:0crwdnd2944171:0crwdne2944171:0