crwdns2933423:0crwdne2933423:0

Main Board Removal

crwdns2931527:0crwdnd2931527:0crwdnd2931527:0crwdnd2931527:0crwdne2931527:0

crwdns2935425:01crwdne2935425:0

crwdns2936315:0crwdne2936315:0
crwdns2936323:0crwdne2936323:0
crwdns2931653:01crwdne2931653:0
Main Board Removal, Remove the main board screws: crwdns2935265:00crwdnd2935265:01crwdnd2935265:02crwdne2935265:0 Main Board Removal, Remove the main board screws: crwdns2935265:00crwdnd2935265:02crwdnd2935265:02crwdne2935265:0
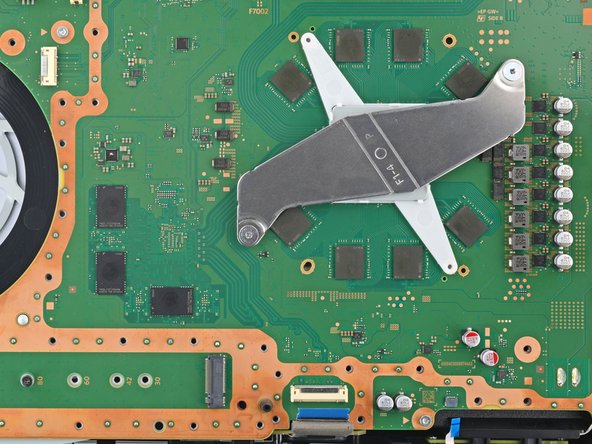
Remove the main board screws
  • Use a Phillips screwdriver to remove the 11 mm‑long SSD screw.

  • Be careful not to lose the small spacer under the screw.

  • Use a Phillips screwdriver to remove the two 11.8 mm‑long APU tension bracket screws.

  • Don't remove or install one screw at a time, or you may damage the APU. During disassembly and reassembly, alternate between the two screws a 1/2 turn at a time to maintain even pressure on the bracket.

  • Use a TR8 Torx security screwdriver to remove the two remaining 7.3 mm‑long main board screws.

crwdns2935429:0crwdne2935429:0

crwdns2935429:0crwdne2935429:0

crwdns2935429:0crwdne2935429:0

crwdns2935429:0crwdne2935429:0

crwdns2935429:0crwdne2935429:0

crwdns2944171:0crwdnd2944171:0crwdnd2944171:0crwdnd2944171:0crwdne2944171:0