crwdns2933423:0crwdne2933423:0

Logitech G935 무선 이어 패드 교체

crwdns2935425:03crwdne2935425:0

crwdns2936315:0crwdne2936315:0
crwdns2936325:0crwdne2936325:0
crwdns2931653:03crwdne2931653:0
Logitech G935 Ear Pads Replacement, Reassembly information: crwdns2935265:00crwdnd2935265:01crwdnd2935265:03crwdne2935265:0 Logitech G935 Ear Pads Replacement, Reassembly information: crwdns2935265:00crwdnd2935265:02crwdnd2935265:03crwdne2935265:0 Logitech G935 Ear Pads Replacement, Reassembly information: crwdns2935265:00crwdnd2935265:03crwdnd2935265:03crwdne2935265:0
Reassembly information
  • Putting the ear pad on the cup can be tricky. Be patient and work slowly—it may take a couple tries.

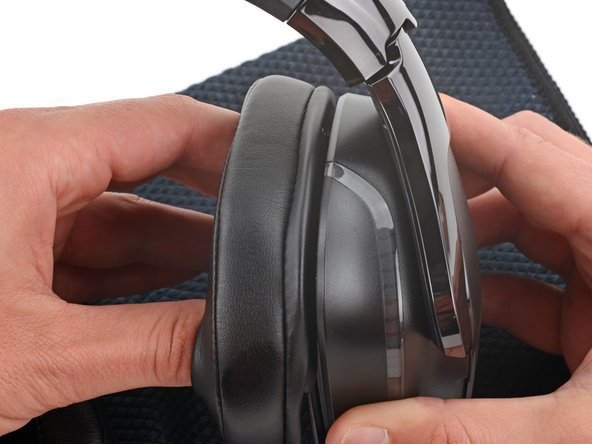
  • To put an ear pad onto its cup:

  • With one hand, firmly hold an ear cup steady.

  • With your free hand, put your fingers into the corresponding ear pad and extend them outwards to stretch the pad.

  • Place the pad over the top of the cup so the fabric flap slides over the cup's plastic lip.

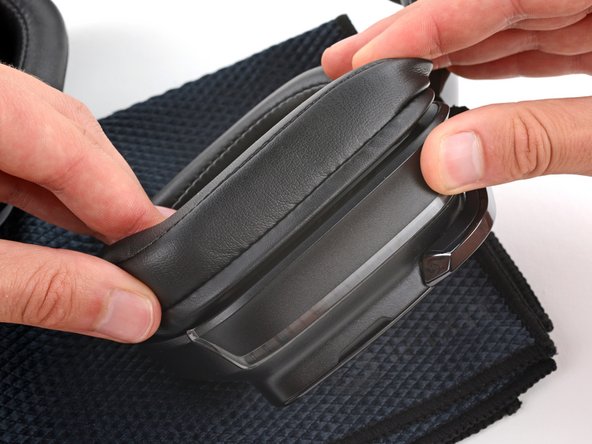
  • Hold the top of the pad firmly in place and thread the rest of the fabric flap over the lip, working your way around the entire cup. Gently stretch the pad as necessary.

  • To prevent the fabric from sliding off its lip, use one hand to secure the section of the pad that's already been put back on.

  • Check the entire perimeter of the cup to make sure the ear pad is fully on. If any of the fabric flap is sticking out, try to push it over the lip or remove the ear pad and try again.

이어 패드를 컵에 끼우는 것은 까다로울 수 있습니다. 몇 번의 시도가 필요할 수 있으니 인내심을 갖고 천천히 작업하세요.

이어 패드를 이어컵에 끼우려면:

한 손으로 이어컵을 단단히 잡고 안정적으로 고정하세요.

다른 한 손으로는 손가락을 해당 이어 패드에 넣고 바깥쪽으로 뻗어 패드를 늘리세요.

패드를 컵 상단 위에 놓아 천 플랩이 컵의 플라스틱 립 위로 미끄러지도록 하세요.

패드의 윗부분을 단단히 잡고 나머지 천 플랩을 립 위에 끼우면서 컵 전체를 감싸주세요. 필요에 따라 패드를 살살 늘리세요.

천이 립에서 미끄러지지 않도록 한 손으로 이미 끼워진 패드 부분을 다시 고정하세요.

컵의 전체 둘레를 확인하여 이어 패드가 완전히 끼워져 있는지 확인하세요. 천 플랩이 튀어나온 부분이 있으면 립 위로 밀어 넣거나 이어 패드를 분리해서 다시 시도하세요.

crwdns2944171:0crwdnd2944171:0crwdnd2944171:0crwdnd2944171:0crwdne2944171:0