crwdns2933423:0crwdne2933423:0

Reemplazo de la Pasta Térmica del Acer Aspire A515-47

crwdns2936315:0crwdne2936315:0
crwdns2936331:0crwdne2936331:0
crwdns2931653:06crwdne2931653:0
Acer Aspire A515-47 Thermal Paste Replacment, Putting back the HeatSink: crwdns2935265:00crwdnd2935265:01crwdnd2935265:03crwdne2935265:0 Acer Aspire A515-47 Thermal Paste Replacment, Putting back the HeatSink: crwdns2935265:00crwdnd2935265:02crwdnd2935265:03crwdne2935265:0 Acer Aspire A515-47 Thermal Paste Replacment, Putting back the HeatSink: crwdns2935265:00crwdnd2935265:03crwdnd2935265:03crwdne2935265:0
Putting back the HeatSink
  • Congrats,you applied the new Thermal Paste.Now,to make this guide short,its just what we did,but in reverse.But here is the detailed assembly

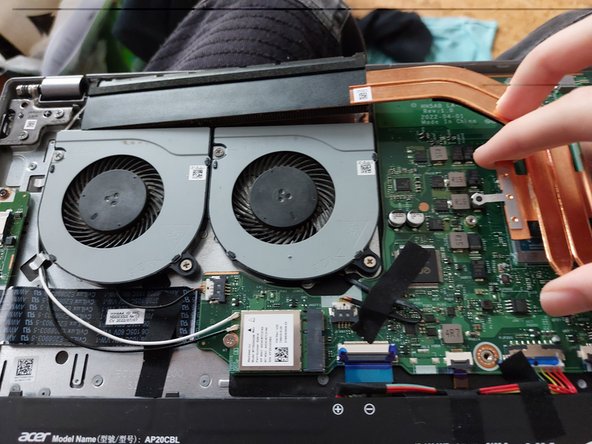
  • First,put the grid part of the heatsink in its designated place

  • Now,make sure the part of the heatsink that goes over the CPU is over the CPU and the Screw Places are aligned with the holes where the screws are placed

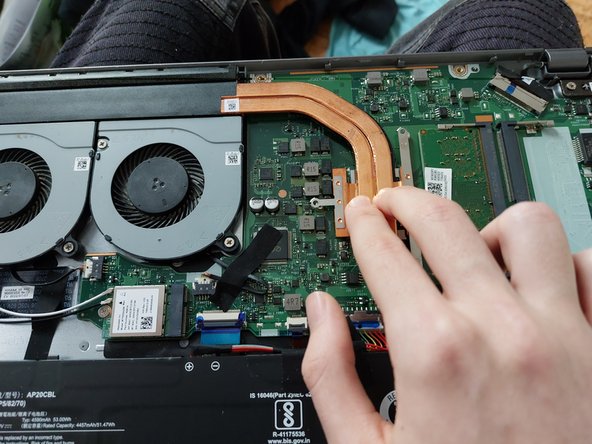
  • Make sure to apply a bit of pressure over the CPU so that the Thermal Paste can spread over the CPU (Like picture 3)

  • Now that you have done that,put the heatsink screws back in their place and tight them up so that the Heatsink wont get loose and create problems

Felicitaciones, aplicaste la nueva Pasta Térmica. Ahora, para hacer esta guía corta, es lo mismo que hicimos pero en reversa. Pero aquí está el ensamble detallado

Primero, pon la rejilla del disipador en su lugar designado.

Ahora, asegúrate que la parte de disipador que va sobre el CPU esté sobre el CPU y los lugares de los tornillos estén alineados con los agujeros donde se ponen los tornillos.

Asegúrate de aplicar un poco de presión en el CPU para que la pasta térmica se esparza sobre el CPU (Como en la imagen 3)

Ahora que ya lo has hecho, coloca los tornillos del disipador de nuevo en su lugar y apriétalos para que el disipador no se afloje y cause problemas.

crwdns2944171:0crwdnd2944171:0crwdnd2944171:0crwdnd2944171:0crwdne2944171:0