crwdns2933423:0crwdne2933423:0

Remplacement de la batterie ASUS X571GT

crwdns2936315:0crwdne2936315:0
crwdns2936317:0crwdne2936317:0
crwdns2931653:03crwdne2931653:0
ASUS X571GT Battery Replacement: crwdns2935265:00crwdnd2935265:01crwdnd2935265:03crwdne2935265:0 ASUS X571GT Battery Replacement: crwdns2935265:00crwdnd2935265:02crwdnd2935265:03crwdne2935265:0 ASUS X571GT Battery Replacement: crwdns2935265:00crwdnd2935265:03crwdnd2935265:03crwdne2935265:0
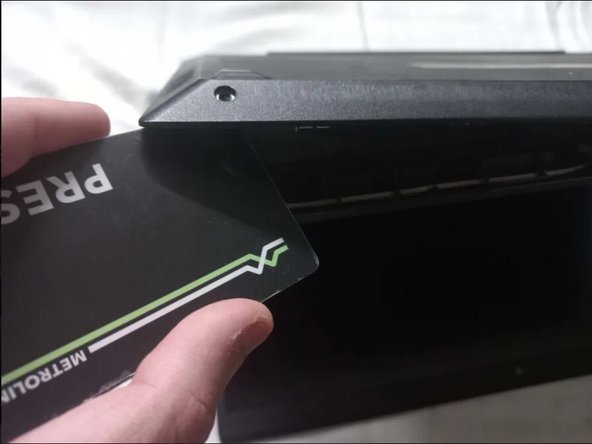
  • Insert an opening tool or plastic card into the thin seam between the back case and the device.

  • Slide the plastic tool around the perimeter of the laptop to release the clips/connectors.

  • Do not pull the back case off without releasing the clips first, as they can break off.

  • Use a piece of tape to help you lift up the back panel initially, so that you can easily insert your plastic tool.

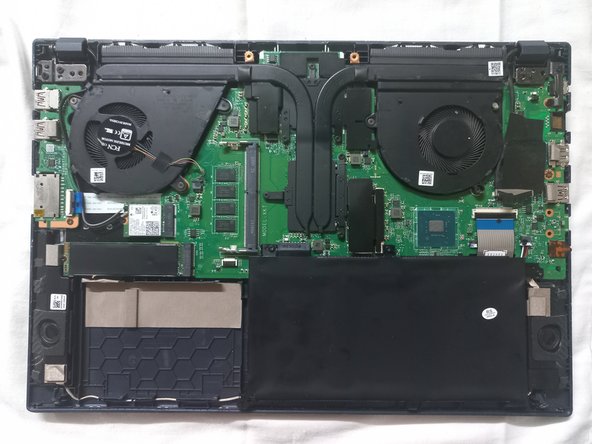
  • Remove the back case to reveal the internals of the laptop.

Insérez un outil fin ou une carte en plastique dans l'espace fin entre le panneau arrière et le reste de l'ordinateur.

Faites coulisser l'outil fin le long du panneau arrière pour décrocher les attaches qui maintiennent le panneau.

Attention à ne pas essayer d'enlever le panneau arrière avant d'avoir décrocher les attaches car elles peuvent casser.

Utilisez un morceau de ruban adhésif pour vous aider à soulever le panneau arrière dans un premier temps, afin de pouvoir insérer facilement votre outil en plastique.

Retirez le panneau arrière pour révéler l'intérieur de l'ordinateur.

crwdns2944171:0crwdnd2944171:0crwdnd2944171:0crwdnd2944171:0crwdne2944171:0