crwdns2933423:0crwdne2933423:0

Reemplazo de potenciómetro en DualShock 4 CUH-ZCT2

crwdns2935425:012crwdne2935425:0

crwdns2936315:0crwdne2936315:0
crwdns2936331:0crwdne2936331:0
crwdns2931653:012crwdne2931653:0
DulaShock 4 CUH-ZCT2 Potentiometer(s) Replacement: crwdns2935265:00crwdnd2935265:01crwdnd2935265:03crwdne2935265:0 DulaShock 4 CUH-ZCT2 Potentiometer(s) Replacement: crwdns2935265:00crwdnd2935265:02crwdnd2935265:03crwdne2935265:0 DulaShock 4 CUH-ZCT2 Potentiometer(s) Replacement: crwdns2935265:00crwdnd2935265:03crwdnd2935265:03crwdne2935265:0
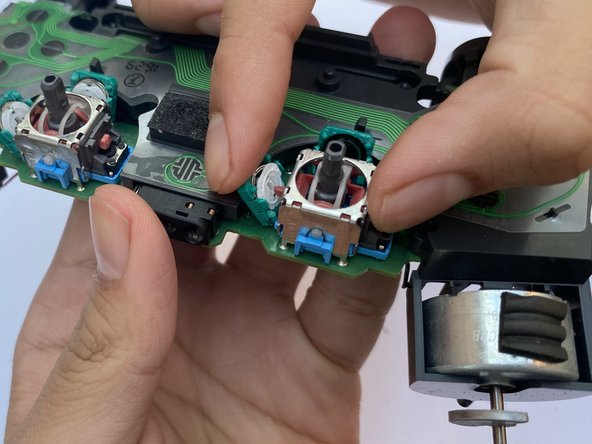
  • Make sure the hole of the potentiometer replacement aligns with the follower (in this first image, it is the orange plastic sticking out).

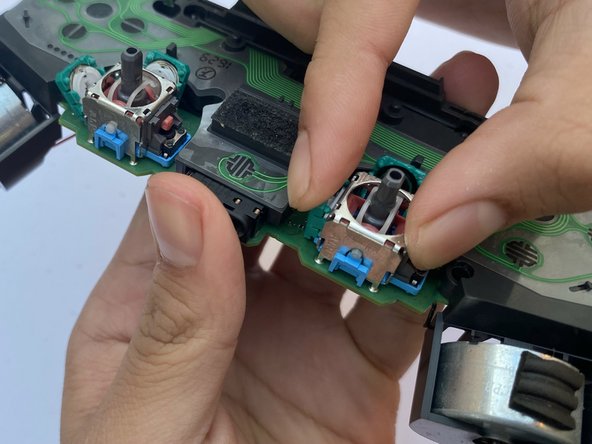
  • After everything is secure, close the case containing the potentiometer replacement.

  • Make sure you hear a click and that the case does not open after closing it. This is to ensure that the potentiometer does not fall out.

Asegúrate que el agujero en el potenciómetro de reemplazo se alinee con el seguidor (en la primer imagen, es el pegamento de plástico naranja que sale).

Después que todo este asegurado, cierra la carcasa que contiene le potenciómetro de reemplazo.

Asegúrate de escuchar un click y que la carcasa no se abra después de cerrarse. Esto es para asegurarse que el potenciómetro no caiga.

crwdns2944171:0crwdnd2944171:0crwdnd2944171:0crwdnd2944171:0crwdne2944171:0