crwdns2933423:0crwdne2933423:0

DualShock 4 CUH-ZCT2 Potentiometer ersetzen

crwdns2935425:012crwdne2935425:0

crwdns2936315:0crwdne2936315:0
crwdns2936319:0crwdne2936319:0
crwdns2931653:012crwdne2931653:0
DulaShock 4 CUH-ZCT2 Potentiometer(s) Replacement: crwdns2935265:00crwdnd2935265:01crwdnd2935265:03crwdne2935265:0 DulaShock 4 CUH-ZCT2 Potentiometer(s) Replacement: crwdns2935265:00crwdnd2935265:02crwdnd2935265:03crwdne2935265:0 DulaShock 4 CUH-ZCT2 Potentiometer(s) Replacement: crwdns2935265:00crwdnd2935265:03crwdnd2935265:03crwdne2935265:0
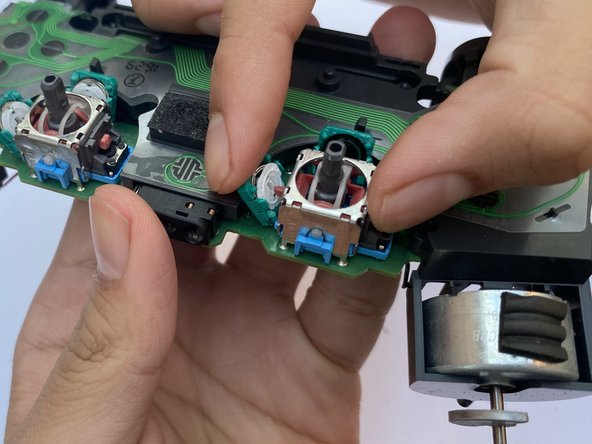
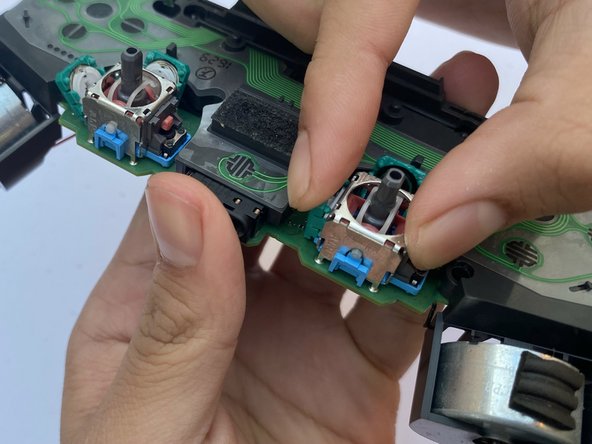
  • Make sure the hole of the potentiometer replacement aligns with the follower (in this first image, it is the orange plastic sticking out).

  • After everything is secure, close the case containing the potentiometer replacement.

  • Make sure you hear a click and that the case does not open after closing it. This is to ensure that the potentiometer does not fall out.

Stelle sicher, dass die Aussparung des Potentiometers an dem Stößel orientiert ist (Im ersten Bild; Das orangene Plastik).

Sobald alles befestigt ist, schließe das Gehäuse des Potentiometers.

Achte darauf, dass das Gehäuse klickt und sich nach dem schließen nicht mehr öffnet. Dies stellt sicher, dass das Potentiometer nicht herausfällt.

crwdns2944171:0crwdnd2944171:0crwdnd2944171:0crwdnd2944171:0crwdne2944171:0