crwdns2933423:0crwdne2933423:0

DulaShock 4 CUH-ZCT2 Potentiometer(s) Replacement

crwdns2936315:0crwdne2936315:0
crwdns2936321:0crwdne2936321:0
crwdns2931653:07crwdne2931653:0
DulaShock 4 CUH-ZCT2 Potentiometer(s) Replacement: crwdns2935265:00crwdnd2935265:01crwdnd2935265:03crwdne2935265:0 DulaShock 4 CUH-ZCT2 Potentiometer(s) Replacement: crwdns2935265:00crwdnd2935265:02crwdnd2935265:03crwdne2935265:0 DulaShock 4 CUH-ZCT2 Potentiometer(s) Replacement: crwdns2935265:00crwdnd2935265:03crwdnd2935265:03crwdne2935265:0
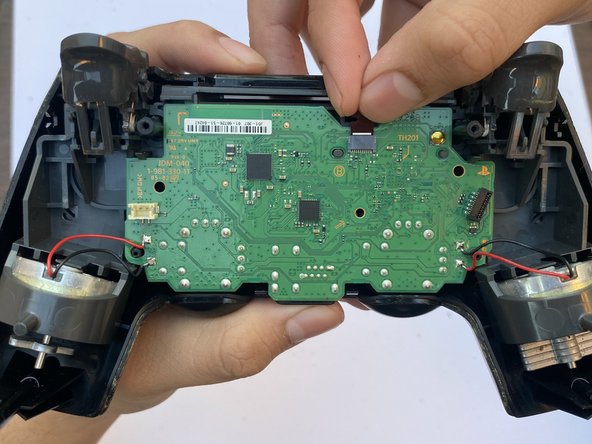
  • Notice the strip connected to the top of the motherboard. Disconnect it using your own fingers.

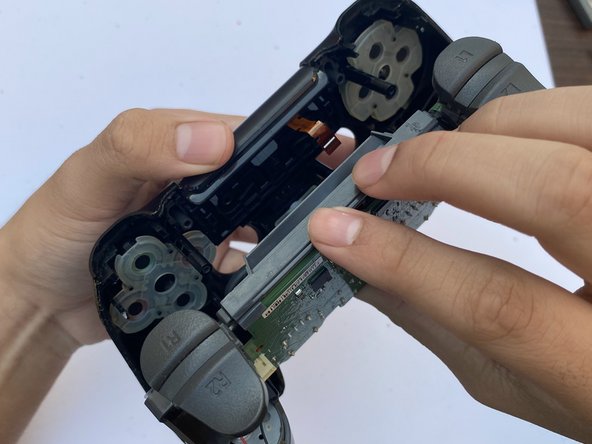
  • Separate the other half of the controller casing from the motherboard.

  • Before separating the casing from the motherboard, make sure the same strip that was connected to the top of the motherboard comes out through the hole it comes from.

crwdns2935429:0crwdne2935429:0

crwdns2935429:0crwdne2935429:0

crwdns2935429:0crwdne2935429:0

crwdns2944171:0crwdnd2944171:0crwdnd2944171:0crwdnd2944171:0crwdne2944171:0