crwdns2933423:0crwdne2933423:0

Changement potentiomètre(s) DualShock 4 CUH-ZCT2

crwdns2936315:0crwdne2936315:0
crwdns2936317:0crwdne2936317:0
crwdns2931653:07crwdne2931653:0
DulaShock 4 CUH-ZCT2 Potentiometer(s) Replacement: crwdns2935265:00crwdnd2935265:01crwdnd2935265:03crwdne2935265:0 DulaShock 4 CUH-ZCT2 Potentiometer(s) Replacement: crwdns2935265:00crwdnd2935265:02crwdnd2935265:03crwdne2935265:0 DulaShock 4 CUH-ZCT2 Potentiometer(s) Replacement: crwdns2935265:00crwdnd2935265:03crwdnd2935265:03crwdne2935265:0
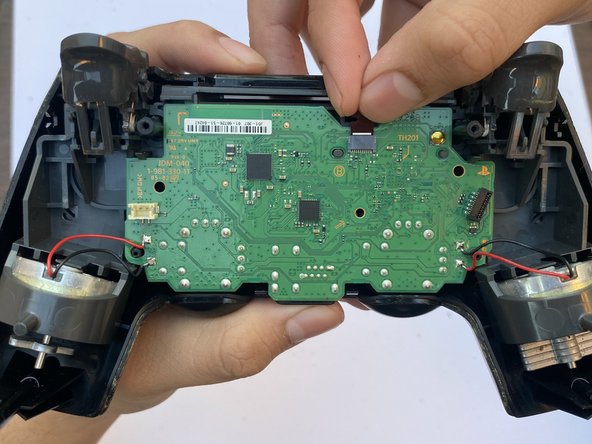
  • Notice the strip connected to the top of the motherboard. Disconnect it using your own fingers.

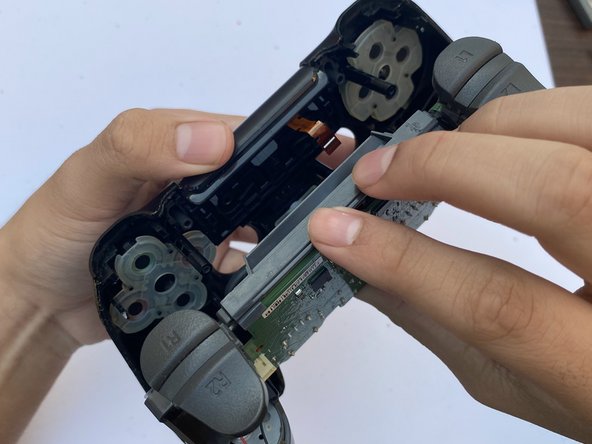
  • Separate the other half of the controller casing from the motherboard.

  • Before separating the casing from the motherboard, make sure the same strip that was connected to the top of the motherboard comes out through the hole it comes from.

Remarquez la nappe reliée à la partie supérieure de la carte mère. Déconnectez-la avec vos doigts.

Séparer l'autre moitié de la coque et la carte mère.

Avant de séparer la coque de la carte mère, assurez-vous que la nappe qui était connectée en haut de la carte mère sorte par le trou d'où elle vient.

crwdns2944171:0crwdnd2944171:0crwdnd2944171:0crwdnd2944171:0crwdne2944171:0