crwdns2931529:0crwdnd2931529:0crwdnd2931529:0crwdnd2931529:06crwdnd2931529:0crwdne2931529:0
crwdns2935425:017crwdne2935425:0
crwdns2931653:017crwdne2931653:0

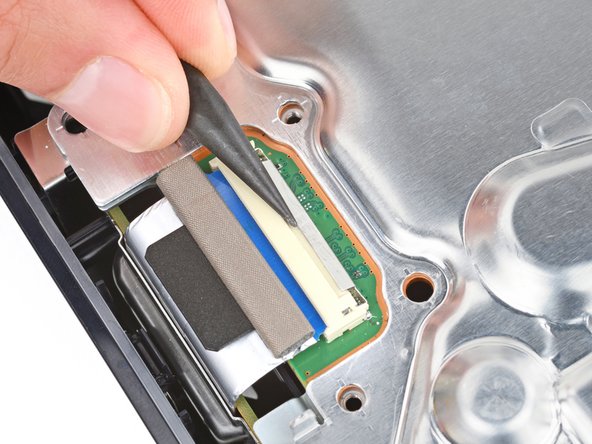
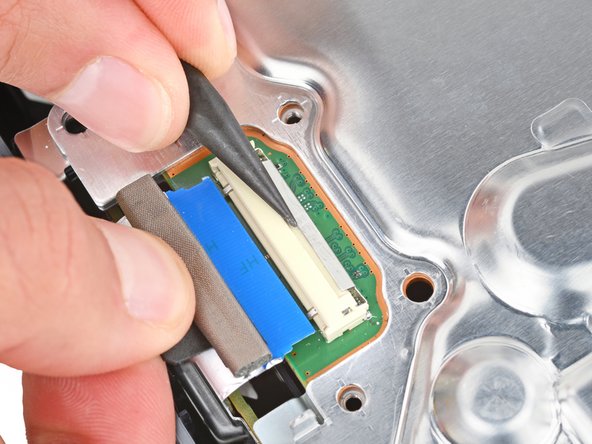


Disconnect the interconnect cable
-
Use the point of a spudger to push the interconnect cable's metal latch down and away from the connector to unlock it.
-
Keep the latch in its unlocked position and carefully pull the interconnect cable straight out of its socket.
crwdns2944171:0crwdnd2944171:0crwdnd2944171:0crwdnd2944171:0crwdne2944171:0