crwdns2933423:0crwdne2933423:0

主基板アセンブリの取り外し

crwdns2931529:0crwdnd2931529:0crwdnd2931529:0crwdnd2931529:06crwdnd2931529:0crwdne2931529:0

crwdns2935425:01crwdne2935425:0

crwdns2936315:0crwdne2936315:0
crwdns2936323:0crwdne2936323:0
crwdns2931653:01crwdne2931653:0
Main Board Assembly Removal, Remove the disc drive: crwdns2935265:00crwdnd2935265:01crwdnd2935265:03crwdne2935265:0 Main Board Assembly Removal, Remove the disc drive: crwdns2935265:00crwdnd2935265:02crwdnd2935265:03crwdne2935265:0 Main Board Assembly Removal, Remove the disc drive: crwdns2935265:00crwdnd2935265:03crwdnd2935265:03crwdne2935265:0
Remove the disc drive
  • If your PlayStation doesn't have a disc drive, skip this step.

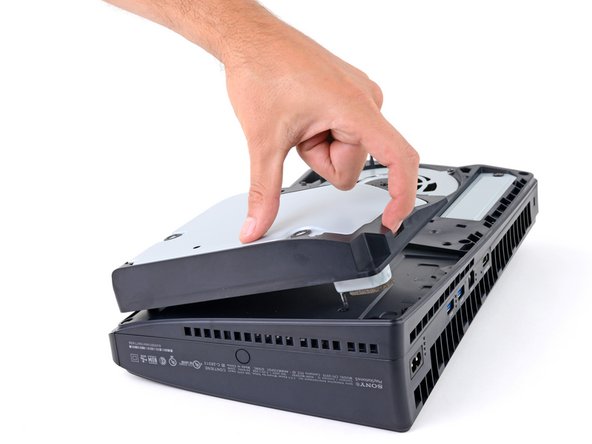
  • Use the cutout on the bottom right corner of the disc drive to lift its right edge and disconnect it.

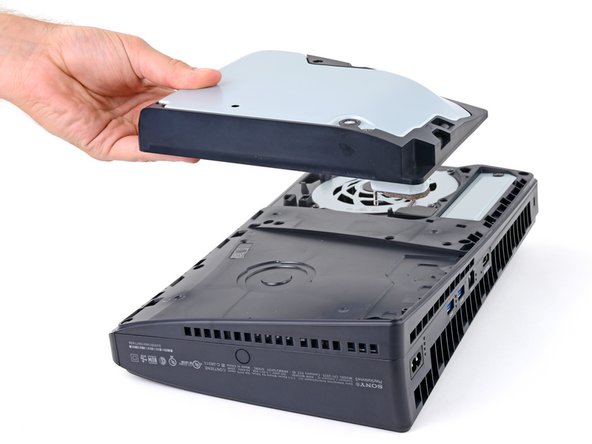
  • Remove the disc drive.

  • During reassembly, place the hooks on the left edge of the drive into their cutouts and firmly press the drive into place so the connector on the bottom right corner goes into its socket.

PlayStationにディスクドライブがない場合は、この手順を飛ばしてください。

ディスクドライブの右下にある切り込みを使って、右端を持ち上げ、接続を外します。

ディスクドライブを取り外します。

再組み立ての際、ドライブの左端にあるフックを切り込みに差し込み、右下角のコネクタがソケットに入るように、ドライブをしっかりと押し込みます。

crwdns2944171:0crwdnd2944171:0crwdnd2944171:0crwdnd2944171:0crwdne2944171:0