crwdns2931529:0crwdnd2931529:0crwdnd2931529:0crwdnd2931529:02crwdnd2931529:0crwdne2931529:0
crwdns2935425:026crwdne2935425:0
crwdns2931653:026crwdne2931653:0


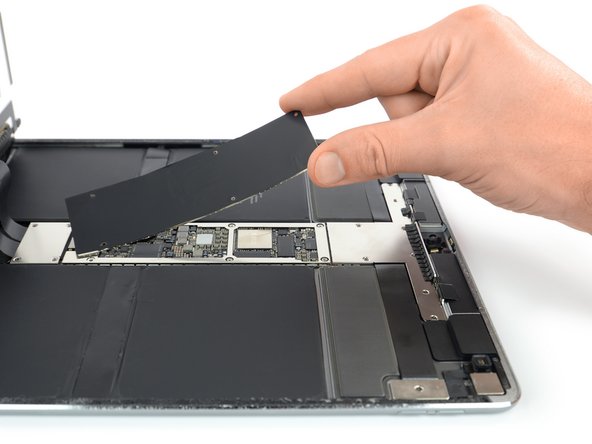


Remove the logic board EMI shield
-
Lift the logic board EMI shield from the edge nearest the top of the iPad.
-
Peel up the EMI shield from the logic board.
-
Remove the logic board EMI shield.
crwdns2944171:0crwdnd2944171:0crwdnd2944171:0crwdnd2944171:0crwdne2944171:0