crwdns2933423:0crwdne2933423:0

Sostituzione batteria iPhone 15 Pro

crwdns2936315:0crwdne2936315:0
crwdns2936321:0crwdne2936321:0
crwdns2931653:05crwdne2931653:0
iPhone 15 Pro Battery Replacement, Pry up the battery: crwdns2935265:00crwdnd2935265:01crwdnd2935265:03crwdne2935265:0 iPhone 15 Pro Battery Replacement, Pry up the battery: crwdns2935265:00crwdnd2935265:02crwdnd2935265:03crwdne2935265:0 iPhone 15 Pro Battery Replacement, Pry up the battery: crwdns2935265:00crwdnd2935265:03crwdnd2935265:03crwdne2935265:0
Pry up the battery
  • Don't bend or crease your battery. If the adhesive feels stubborn, apply a few more drops of isopropyl alcohol and try again.

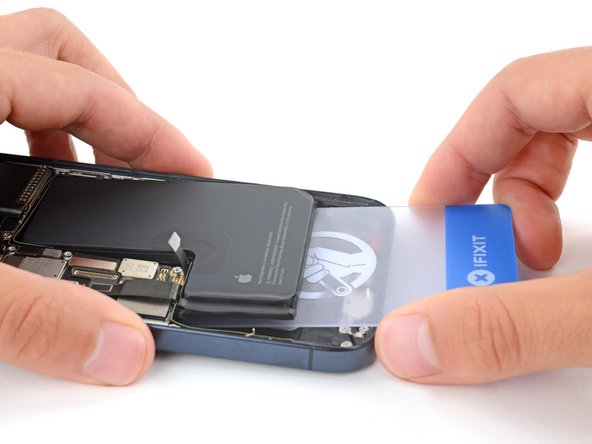
  • Insert the short edge of a plastic card between the bottom edge of the battery and the frame.

  • Be careful not to scrape the frame underneath the battery—the wireless charging coil is exposed near the center.

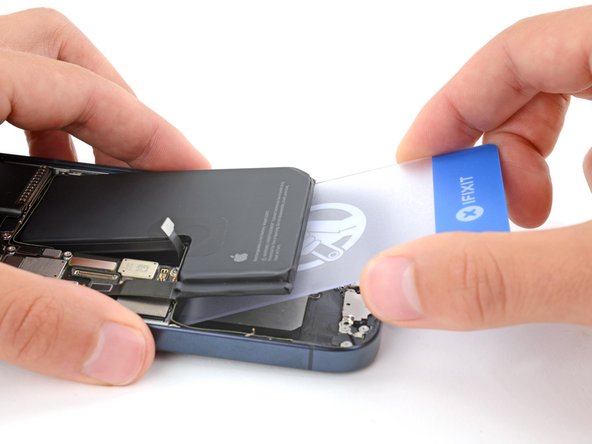
  • Gently pry up the battery until the adhesive fully separates.

  • Depending on how strong your adhesive is, this may take some time. Allow up to a minute of constant pressure for the adhesive to loosen.

Non piegare la batteria. Se l'adesivo sembra ancora rigido, applica ancora qualche goccia di alcol isopropilico e prova di nuovo.

Inserisci il bordo corto di una scheda di plastica tra il bordo inferiore della batteria e la cornice.

Fai attenzione a non graffiare la cornice sotto la batteria: la bobina di ricarica senza fili è esposta vicino al centro.

Alza delicatamente la batteria fino a che l'adesivo non si separa completamente.

A seconda di quanto è forte l'adesivo, questo potrebbe richiedere del tempo. Applica una pressione costante fino a un minuto per allentare l'adesivo.

crwdns2944171:0crwdnd2944171:0crwdnd2944171:0crwdnd2944171:0crwdne2944171:0