crwdns2933423:0crwdne2933423:0

iPhone 15 Pro バッテリーの交換

crwdns2936315:0crwdne2936315:0
crwdns2936323:0crwdne2936323:0
crwdns2931653:03crwdne2931653:0
iPhone 15 Pro Battery Replacement, Remove the stretch release adhesive: crwdns2935265:00crwdnd2935265:01crwdnd2935265:03crwdne2935265:0 iPhone 15 Pro Battery Replacement, Remove the stretch release adhesive: crwdns2935265:00crwdnd2935265:02crwdnd2935265:03crwdne2935265:0 iPhone 15 Pro Battery Replacement, Remove the stretch release adhesive: crwdns2935265:00crwdnd2935265:03crwdnd2935265:03crwdne2935265:0
Remove the stretch release adhesive
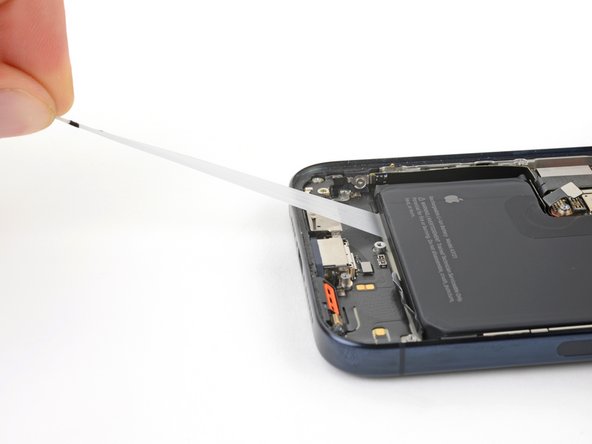
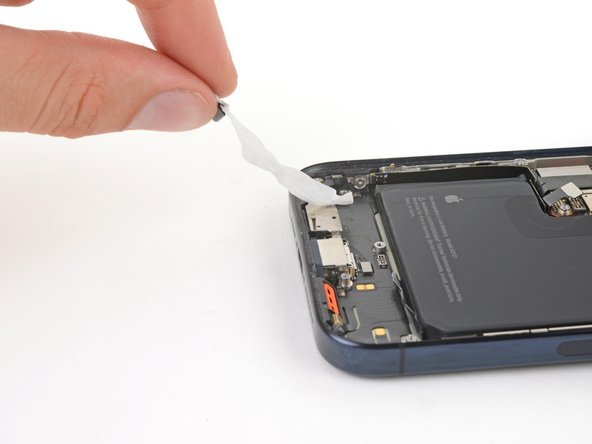
  • Pull one of the pull tabs out from under the battery until you can grip it with your fingers or wrap it around your tool.

  • Hold the phone steady using the edges of the frame—don't press down on the battery.

  • Pull the strip slowly, evenly, and at a low angle without dragging on other components.

  • Continue pulling, re-gripping or wrapping it around your tool as you go, until the strip fully releases from under the battery.

  • If the strip breaks off, try to retrieve it. If you can't grip it from under the battery, move on to the next step.

  • Repeat this step for the other two strips.

プルタブの1本をバッテリーの下から引き抜き、指で握れるまで取り出すか、ツールの先端に巻きつけます

フレームの端を押さえてデバイスを固定させます。バッテリー自体を触らないでください。

他の部品に引っ掛けないように、慎重にゆっくりと、均等に、低い角度でストリップを引きぬきます。

ストリップがバッテリーの下から完全に外れるまで、引っ張り、ストリップが長くなれば、バッテリー近くで持ち直したり、ツールに巻きつけながら作業を続けます。

ストリップが途中で切断たら、なんとか残りのストリップを取り出してください。バッテリーの下からつかめない場合は、次の手順に進んでください。

他の2本のストリップについても、この手順を繰り返します。

crwdns2944171:0crwdnd2944171:0crwdnd2944171:0crwdnd2944171:0crwdne2944171:0