crwdns2933423:0crwdne2933423:0

USB-C Port Bracket Removal

crwdns2931529:0crwdnd2931529:0crwdnd2931529:0crwdnd2931529:010crwdnd2931529:0crwdne2931529:0

crwdns2935425:05crwdne2935425:0

crwdns2936315:0crwdne2936315:0
crwdns2936325:0crwdne2936325:0
crwdns2931653:05crwdne2931653:0
USB-C Port Bracket Removal, Reassembly information: crwdns2935265:00crwdnd2935265:01crwdnd2935265:03crwdne2935265:0 USB-C Port Bracket Removal, Reassembly information: crwdns2935265:00crwdnd2935265:02crwdnd2935265:03crwdne2935265:0 USB-C Port Bracket Removal, Reassembly information: crwdns2935265:00crwdnd2935265:03crwdnd2935265:03crwdne2935265:0
Reassembly information
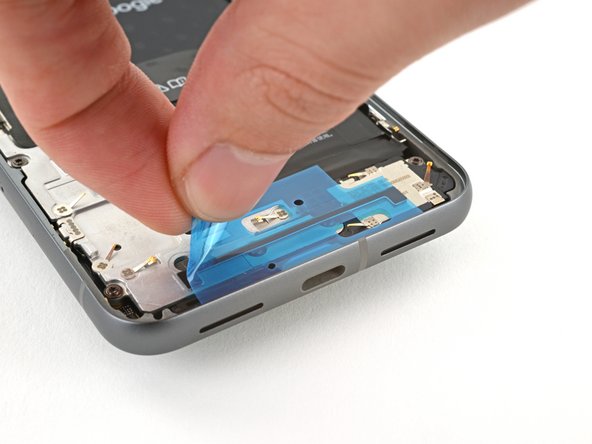
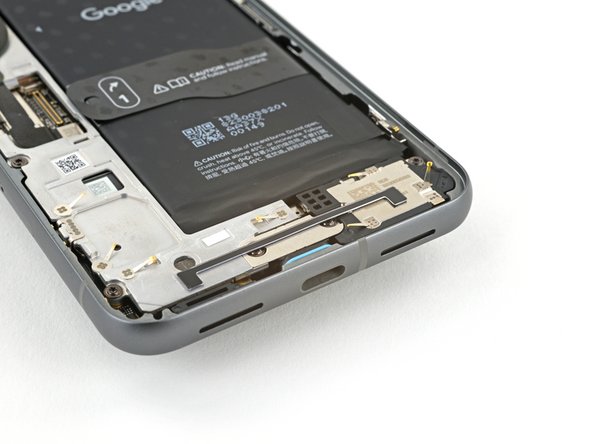
  • During reassembly, follow this step to replace the plastic shim that runs across the bottom of the midframe and loudspeaker. If you don't have a replacement, press the old one back into place.

  • Remove the clear liner from the shim.

  • Use the markings on the midframe to align the left side of the shim and press it into place.

  • Use the flat end of a spudger to firmly press down along the whole shim to secure it.

  • Remove the blue liner.

crwdns2935429:0crwdne2935429:0

crwdns2935429:0crwdne2935429:0

crwdns2935429:0crwdne2935429:0

crwdns2935429:0crwdne2935429:0

crwdns2935429:0crwdne2935429:0

crwdns2944171:0crwdnd2944171:0crwdnd2944171:0crwdnd2944171:0crwdne2944171:0