crwdns2933423:0crwdne2933423:0

ポラロイドI-2のコンデンサーを放電する方法

crwdns2935425:03crwdne2935425:0

crwdns2936315:0crwdne2936315:0
crwdns2936323:0crwdne2936323:0
crwdns2931653:03crwdne2931653:0
How to Discharge the Capacitor in your Polaroid I-2, Apply the leads: crwdns2935265:00crwdnd2935265:01crwdnd2935265:03crwdne2935265:0 How to Discharge the Capacitor in your Polaroid I-2, Apply the leads: crwdns2935265:00crwdnd2935265:02crwdnd2935265:03crwdne2935265:0 How to Discharge the Capacitor in your Polaroid I-2, Apply the leads: crwdns2935265:00crwdnd2935265:03crwdnd2935265:03crwdne2935265:0
Apply the leads
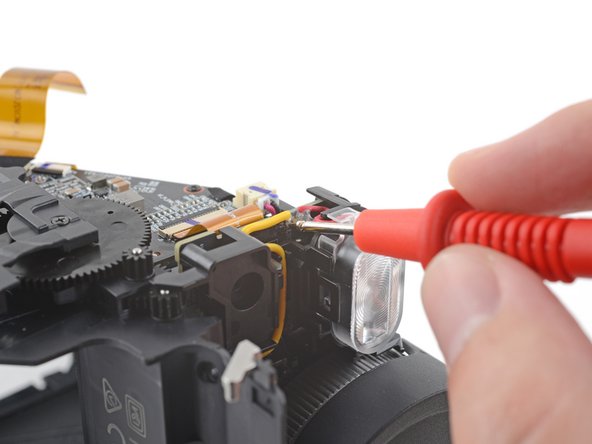
  • Touch the terminating end of the yellow wire with the red positive lead.

  • You may have to apply some extra force to puncture any remaining gel. If you aren't getting any feedback from your tool, check if this lead is puncturing the gel.

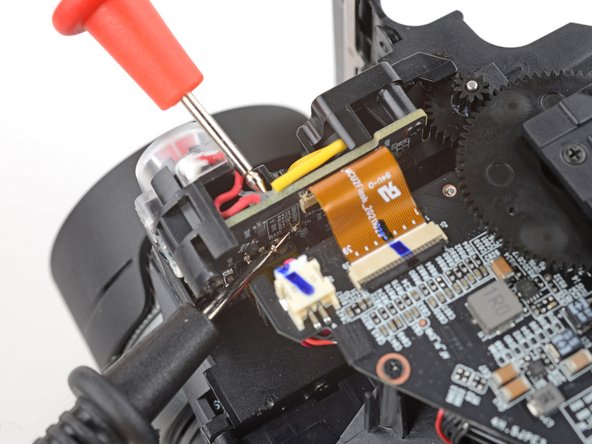
  • While applying the positive lead, touch the terminating end of the black wire with the black negative lead.

  • Depending on your discharge tool, you may need to hold the leads in this position for a few minutes.

  • Follow the instructions included with your tool to determine when your capacitor is fully discharged.

黄色のワイヤーの終端を、赤のプラス・リード線に接触させる。

残っているゲルを穿刺するために、少し力を加える必要があるかもしれません。道具から何のフィードバックも得られない場合は、このリードがゲルを穿刺しているかどうかをチェックしてください。

プラスリード線を当てながら、黒線の先端を黒のマイナスリード線に接触させます。

放電ツールによっては、リード線をこの位置に数分間固定しておく必要があります。

コンデンサが完全に放電されたタイミングを判断するには、ツールに付属の説明書に従ってください。

crwdns2944171:0crwdnd2944171:0crwdnd2944171:0crwdnd2944171:0crwdne2944171:0