crwdns2933423:0crwdne2933423:0

JBL Boombox Hochtöner ersetzen

crwdns2931529:0crwdnd2931529:0crwdnd2931529:0crwdnd2931529:03crwdnd2931529:0crwdne2931529:0

crwdns2936315:0crwdne2936315:0
crwdns2936319:0crwdne2936319:0
crwdns2931653:08crwdne2931653:0
JBL Boombox Tweeter Speaker Replacement, Remove the Tweeter Housing: crwdns2935265:00crwdnd2935265:01crwdnd2935265:02crwdne2935265:0 JBL Boombox Tweeter Speaker Replacement, Remove the Tweeter Housing: crwdns2935265:00crwdnd2935265:02crwdnd2935265:02crwdne2935265:0
Remove the Tweeter Housing
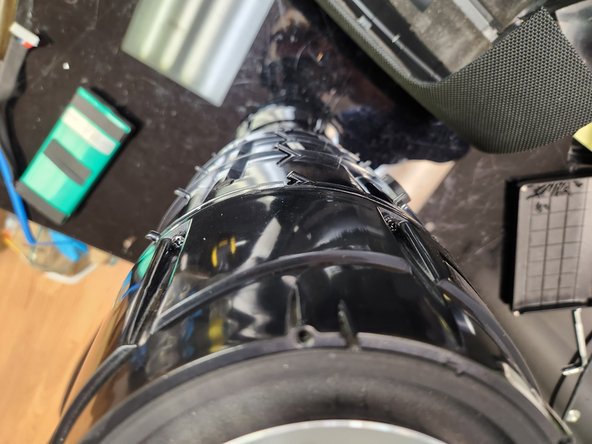
  • There are six screws surrounding each side of the tweeter housing.

  • Unfortunately, due to the angles involved, it is impossible to take a photo that shows all six. Just know they are relatively evenly spaced out.

  • Remove all six screws from each side, twelve total.

  • Keep these screws separate, as they do not match screws used in other steps.

  • Once the screws are removed, be careful not to pull the housing away. The tweeter speakers are still physically connected to the motherboard, and pulling the housings away can damage these connections or the motherboard.

Auf jeder Seite des Gehäuses befinden sich 6 Schrauben.

Wegen des Betrachtungswinkels ist es leider unmöglich ein Foto zu machen, das alle 6 Schrauben zeigt. Aber sie sind mit relativ gleichmäßigen Abständen verteilt.

Entferne auf beiden Seiten die 6 Schrauben, also 12 insgesamt.

Bewahre die Schrauben separat auf, da sie nur hier passen.

Sobald die Schrauben entfernt sind, solltest du das Gehäuse nicht einfach abziehen. Die Hochtöner sind immer noch mit dem Motherboard verbunden und das Abziehen des Gehäuses kann diese Verbindungen oder das Motherboard beschädigen.

crwdns2944171:0crwdnd2944171:0crwdnd2944171:0crwdnd2944171:0crwdne2944171:0