crwdns2933423:0crwdne2933423:0

Logic Board Assembly Removal

crwdns2931529:0crwdnd2931529:0crwdnd2931529:0crwdnd2931529:03crwdnd2931529:0crwdne2931529:0

crwdns2936315:0crwdne2936315:0
crwdns2936321:0crwdne2936321:0
crwdns2931653:03crwdne2931653:0
Logic Board Assembly Removal, Secure antenna 1: crwdns2935265:00crwdnd2935265:01crwdnd2935265:03crwdne2935265:0 Logic Board Assembly Removal, Secure antenna 1: crwdns2935265:00crwdnd2935265:02crwdnd2935265:03crwdne2935265:0 Logic Board Assembly Removal, Secure antenna 1: crwdns2935265:00crwdnd2935265:03crwdnd2935265:03crwdne2935265:0
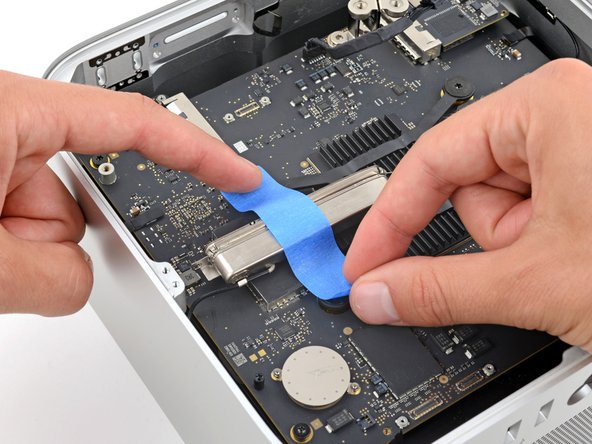
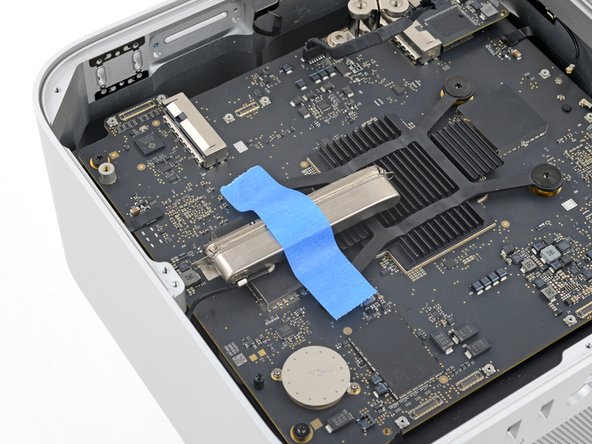
Secure antenna 1
  • Be very careful not to scrape off or damage any surface mounted components during this step.

  • Gently lay antenna 1 to the left of the heatsink, being careful not to strain its cable.

  • Secure antenna 1 to the logic board with a strip of painters tape.

  • Stick the tape to the heatsink screws, not directly onto the board.

crwdns2935429:0crwdne2935429:0

crwdns2935429:0crwdne2935429:0

crwdns2935429:0crwdne2935429:0

crwdns2935429:0crwdne2935429:0

crwdns2944171:0crwdnd2944171:0crwdnd2944171:0crwdnd2944171:0crwdne2944171:0