crwdns2931529:0crwdnd2931529:0crwdnd2931529:0crwdnd2931529:07crwdnd2931529:0crwdne2931529:0
crwdns2935425:06crwdne2935425:0
crwdns2931653:06crwdne2931653:0

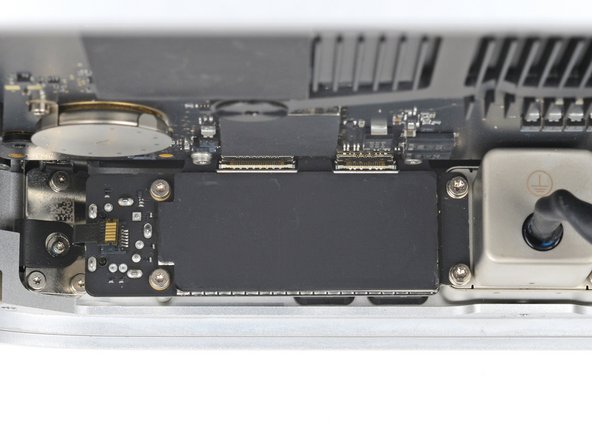


Remove the I/O board screws
-
Use a T4 Torx screwdriver to remove the two 15.5 mm‑long screws securing the outer edge of the I/O board.
-
Use a T6 Torx screwdriver to remove the two 20 mm‑long screws securing the inner edge of the I/O board.
-
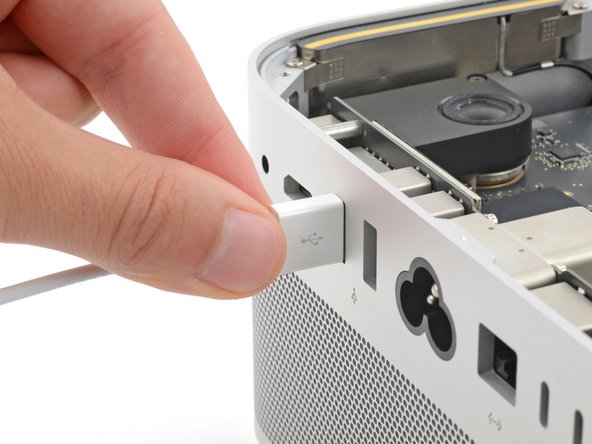
Partially tighten the four screws securing the board.
-
Lay your Mac Studio down and plug a cable into one of the ports to ensure proper fit and alignment, adjusting the port as necessary—the cable should be easy to insert and remove.
-
With the cable plugged in and the board in position, fully tighten all four screws.
-
Unplug all cables before continuing.
crwdns2944171:0crwdnd2944171:0crwdnd2944171:0crwdnd2944171:0crwdne2944171:0