crwdns2933423:0crwdne2933423:0

Mac Studio 2023 Bodenplatte tauschen

crwdns2931529:0crwdnd2931529:0crwdnd2931529:0crwdnd2931529:020crwdnd2931529:0crwdne2931529:0

crwdns2935425:01crwdne2935425:0

crwdns2936315:0crwdne2936315:0
crwdns2936319:0crwdne2936319:0
crwdns2931653:01crwdne2931653:0
Mac Studio 2023 Bottom Cover Replacement, Remove the bottom cover screws: crwdns2935265:00crwdnd2935265:01crwdnd2935265:02crwdne2935265:0 Mac Studio 2023 Bottom Cover Replacement, Remove the bottom cover screws: crwdns2935265:00crwdnd2935265:02crwdnd2935265:02crwdne2935265:0
Remove the bottom cover screws
  • While the Mac Studio uses Torx Plus screws, standard Torx bits work. Make sure to apply constant, downward force to prevent stripping.

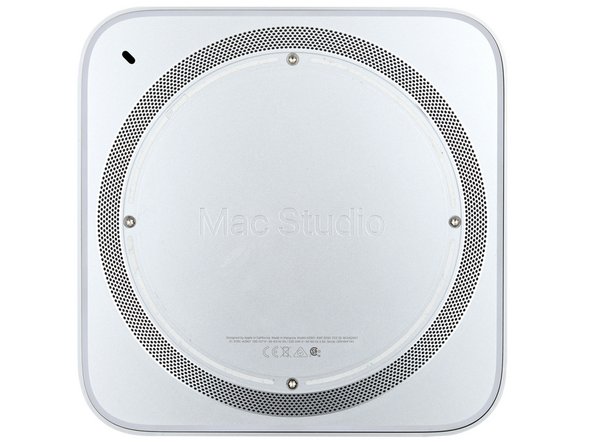
  • Use a T10 Torx screwdriver to remove the four 8 mm‑long screws securing the bottom cover.

  • Throughout this repair, keep track of each screw and make sure it goes back exactly where it came.

Im Mac Studio werden Torx Plus Schrauben verwendet, Standard Torx Bits gehen aber. Achte darauf, dass du beim Losschrauben fest und gleichmäßig nach unten drückst, damit die Schraubenköpfe nicht beschädigt werden.

Nimm einen T10 Torx Schraubendreher und entferne die vier 8 mm langen Schrauben, mit denen die Bodenplatte befestigt ist.

Halte während der gesamten Reparatur die Schrauben gut geordnet und achte darauf, dass jede an ihren alten Platz zurück kommt.

crwdns2944171:0crwdnd2944171:0crwdnd2944171:0crwdnd2944171:0crwdne2944171:0