crwdns2933423:0crwdne2933423:0

Dual BT 10 Mainboard Disassembly

crwdns2936315:0crwdne2936315:0
crwdns2936323:0crwdne2936323:0
crwdns2931653:06crwdne2931653:0
Dual BT 10 Mainboard Disassembly, Unscrewing the front mesh: crwdns2935265:00crwdnd2935265:01crwdnd2935265:03crwdne2935265:0 Dual BT 10 Mainboard Disassembly, Unscrewing the front mesh: crwdns2935265:00crwdnd2935265:02crwdnd2935265:03crwdne2935265:0 Dual BT 10 Mainboard Disassembly, Unscrewing the front mesh: crwdns2935265:00crwdnd2935265:03crwdnd2935265:03crwdne2935265:0
Unscrewing the front mesh
  • Remove the four screws holding the front mesh

  • Separate the black plastic from the silver part

  • There is a cable connecting both parts! Be careful.

  • The mainboard is not screwed in place and will be loose after this step

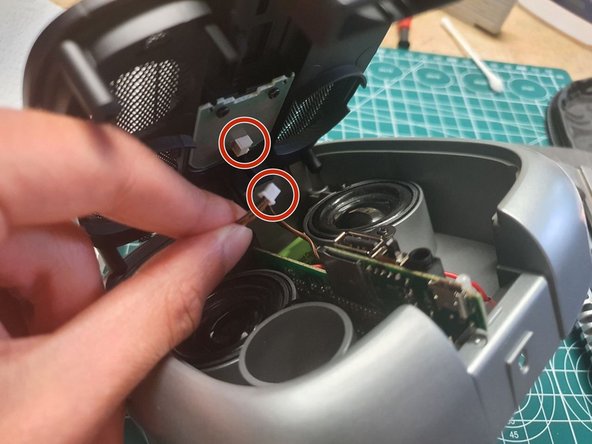
  • Disconnect the brown cable from the small PCB to fully remove the black plastic

crwdns2935429:0crwdne2935429:0

crwdns2935429:0crwdne2935429:0

crwdns2935429:0crwdne2935429:0

crwdns2935429:0crwdne2935429:0

crwdns2935429:0crwdne2935429:0

crwdns2944171:0crwdnd2944171:0crwdnd2944171:0crwdnd2944171:0crwdne2944171:0