crwdns2933423:0crwdne2933423:0

Logic Board entfernen

crwdns2931529:0crwdnd2931529:0crwdnd2931529:0crwdnd2931529:07crwdnd2931529:0crwdne2931529:0

crwdns2936315:0crwdne2936315:0
crwdns2936319:0crwdne2936319:0
crwdns2931653:04crwdne2931653:0
Logic Board Removal, Reassembly information: crwdns2935265:00crwdnd2935265:01crwdnd2935265:03crwdne2935265:0 Logic Board Removal, Reassembly information: crwdns2935265:00crwdnd2935265:02crwdnd2935265:03crwdne2935265:0 Logic Board Removal, Reassembly information: crwdns2935265:00crwdnd2935265:03crwdnd2935265:03crwdne2935265:0
Reassembly information
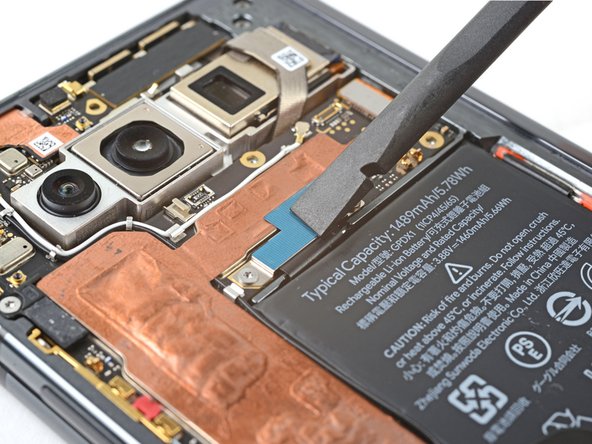
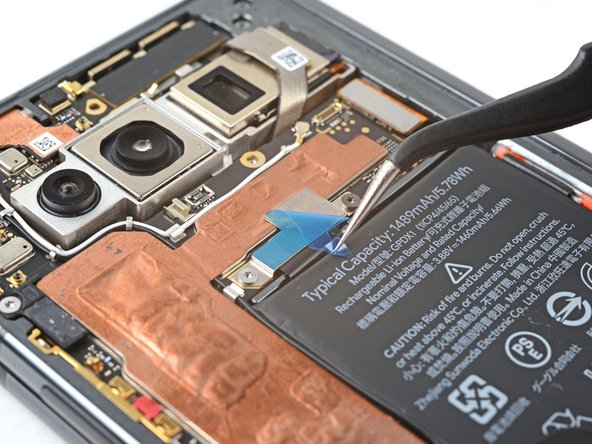
  • During reassembly, perform the following to replace the conductive tape:

  • Peel off the new conductive tape from its liner and apply the sticky side to the press connector, making sure to bridge the logic board.

  • Use a spudger, or your fingers, to press down the conductive tape and adhere it.

  • Use tweezers, or your fingers, to pull on the tab and expose the tape.

Tue während dem Wiederzusammenbau folgendes, um das leitfähige Klebeband zu ersetzen:

Ziehe das neue leitfähige Klebeband von seinem Träger ab und klebe die klebrige Seite auf den Druckverbinder, wobei du darauf achten musst, die Logikkarte zu überbrücken.

Benutze einen Spudger oder deine Finger, um den Klebestreifen festzudrücken.

Benutze eine Pinzette oder deine Finger, um an der Lasche zu ziehen und den Klebestreifen freizulegen.

crwdns2944171:0crwdnd2944171:0crwdnd2944171:0crwdnd2944171:0crwdne2944171:0